Description –
Computer code in addition to the hardware will help generate, modulate and activate a system in which concentration of CO in the atmosphere can be determined. The indication of level of CO in the atmosphere can guide the users with the amount of polluted atmosphere around them and will also at the same time assist in the suitable and well-timed evacuation in case of fire. In the first case it would also help to modify the space depending on the level of CO rather than abandoning it. The microprocessor, wireless sensor and the open source software configuration are teamed together to form a unit which can be integrated in a space forming a responsive environment or setting. The spatially cohesive assembly can be a part of any media responsive built environment.
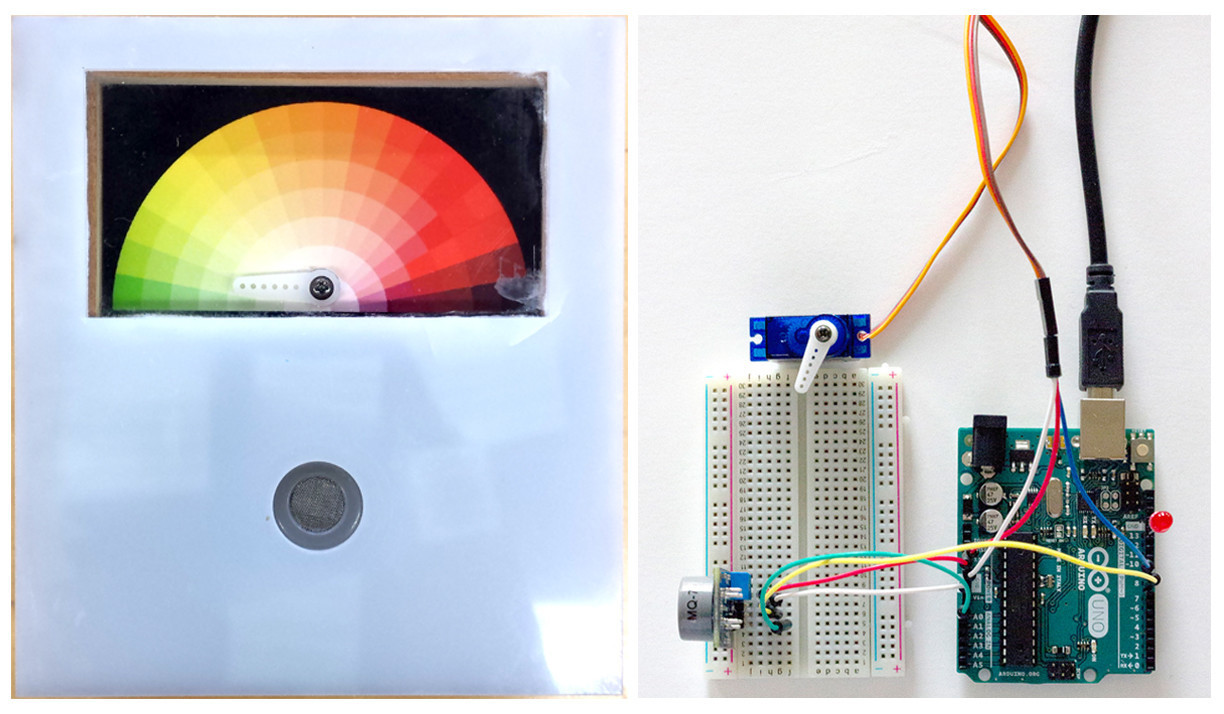
In our experiment the indication of CO levels would be demonstrated using Gas Sensor, blinking LED (in relation with CO levels), and Servo motor.
(Team members – Koushik Thunuguntla, Unnati Masurkar, Aniket Marathe)
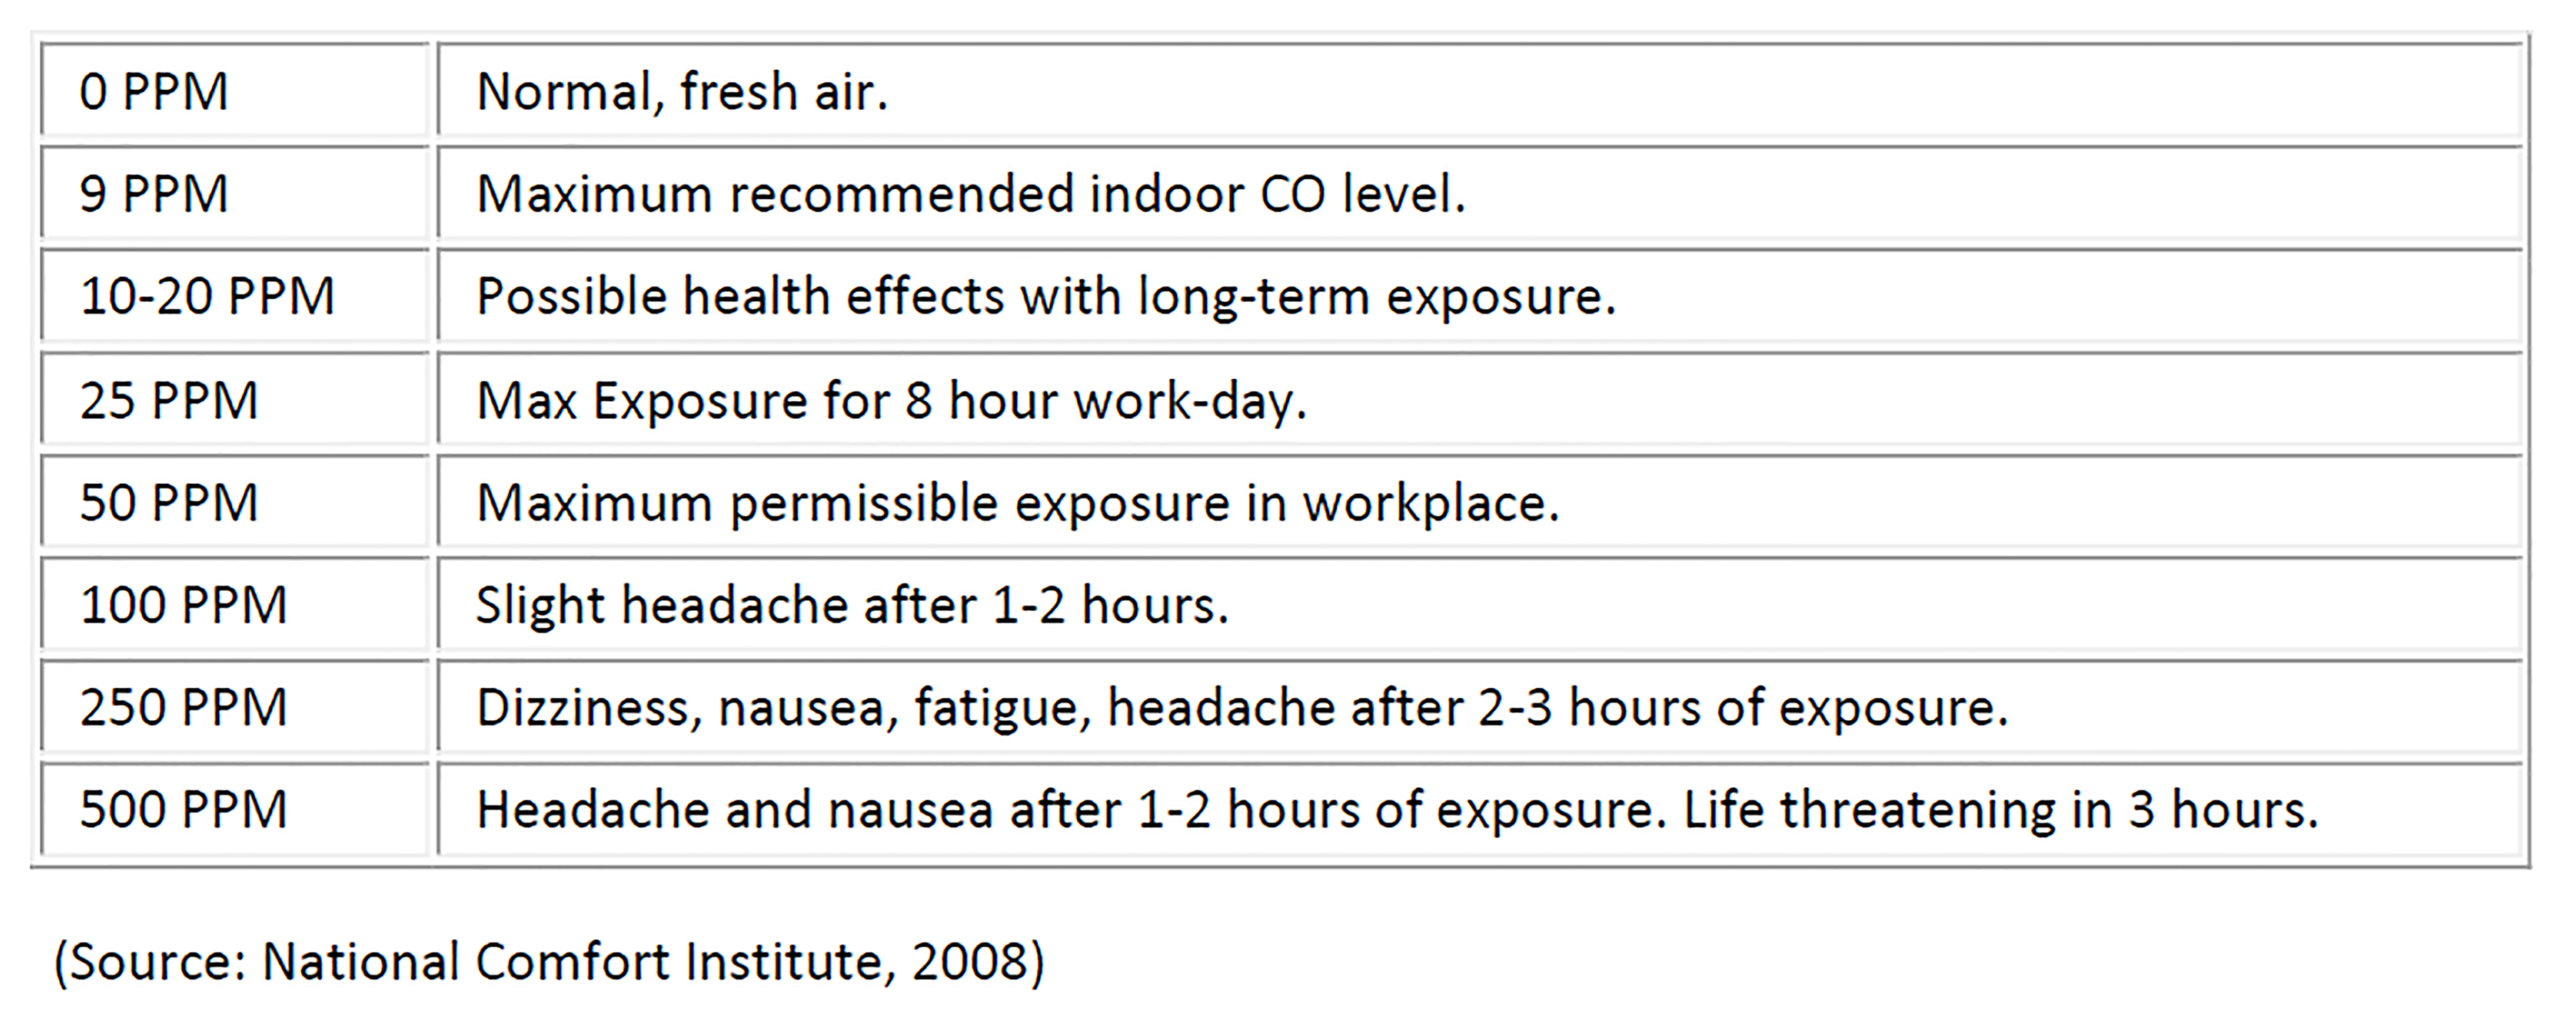
Statistics of CO levels in atmosphere and its effect –
The best way to determine if one is being exposed to CO in the environment, particularly in low-levels, is with a CO detector. A better way to stay safe is with a CO monitor that has a color spectrum readout. This allows one to monitor levels anywhere in the environment. It also gives one the ability to routinely test the detector with a small source of CO. The level of CO concentration is measured using a system called Parts per Million (PPM). For example, 100 PPM CO means that for every 999,900 molecules of air, there are 100 molecules of CO. CO effects people differently depending on the concentration. If one is continually exposed to 50 PPM CO throughout the day it causes health effects. Below is the summary of some health effects due to prolonged exposure to various concentrations of CO, as well as some government recommended limits.
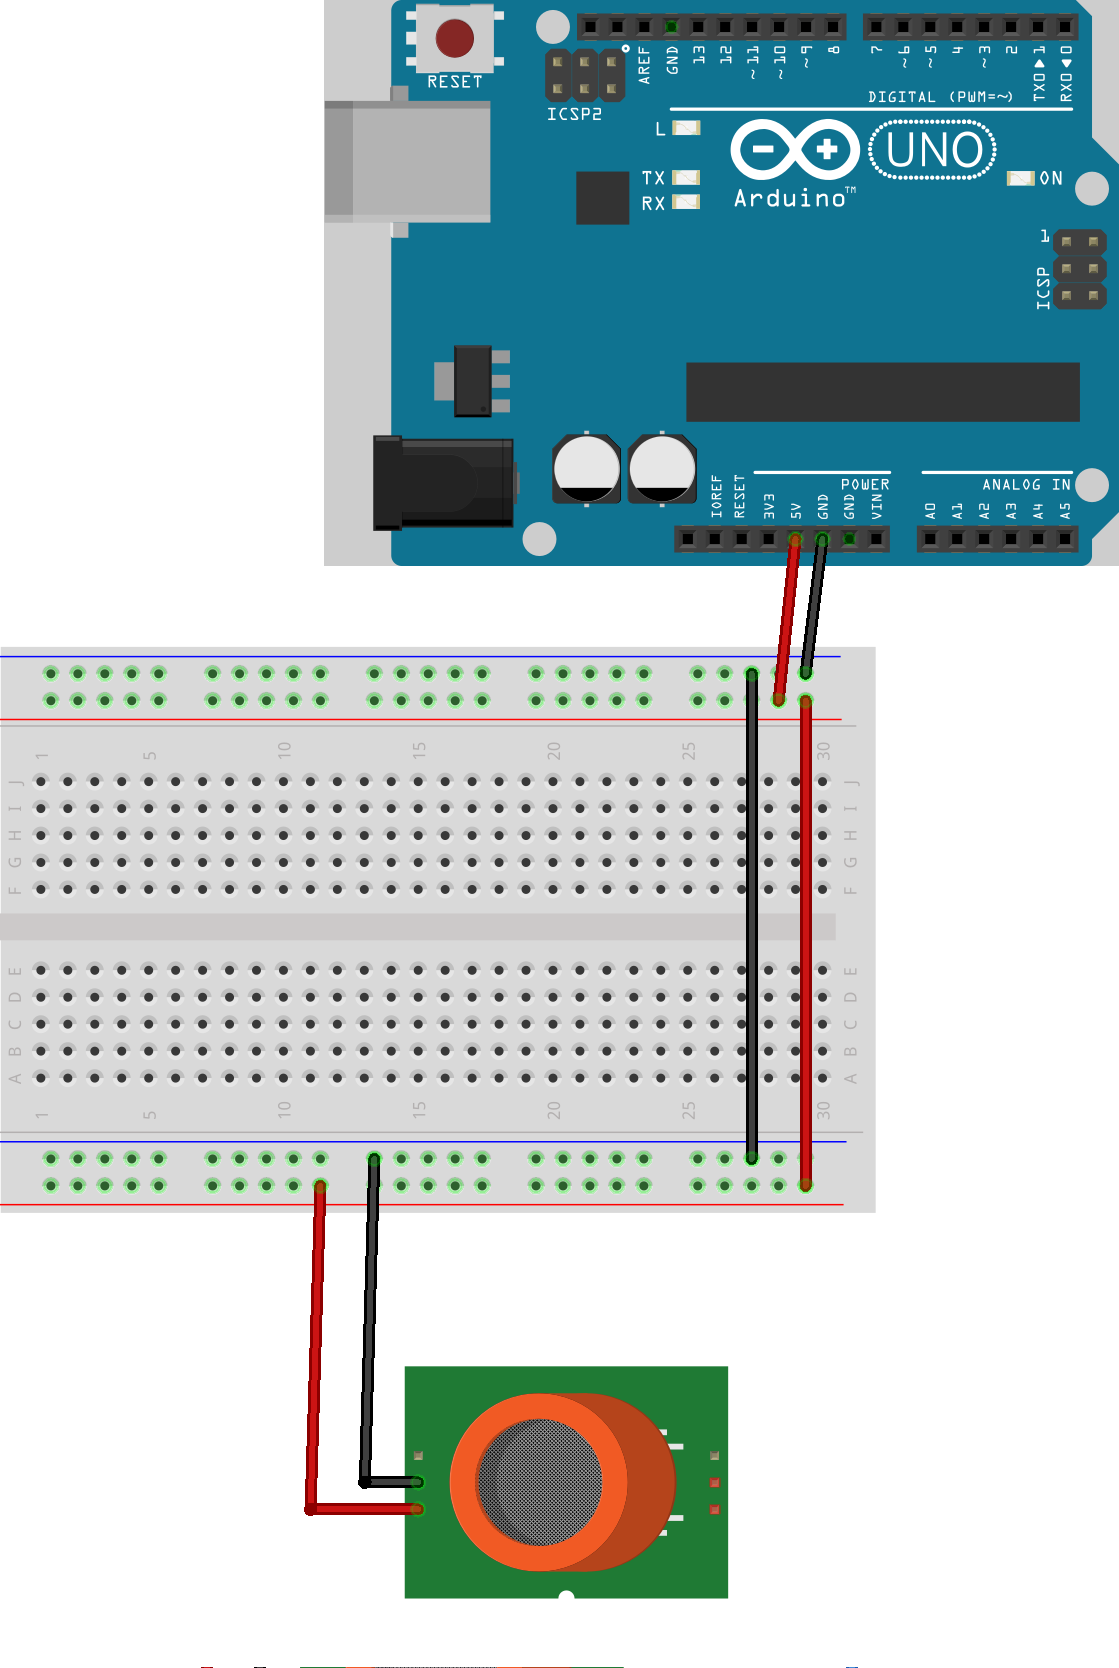
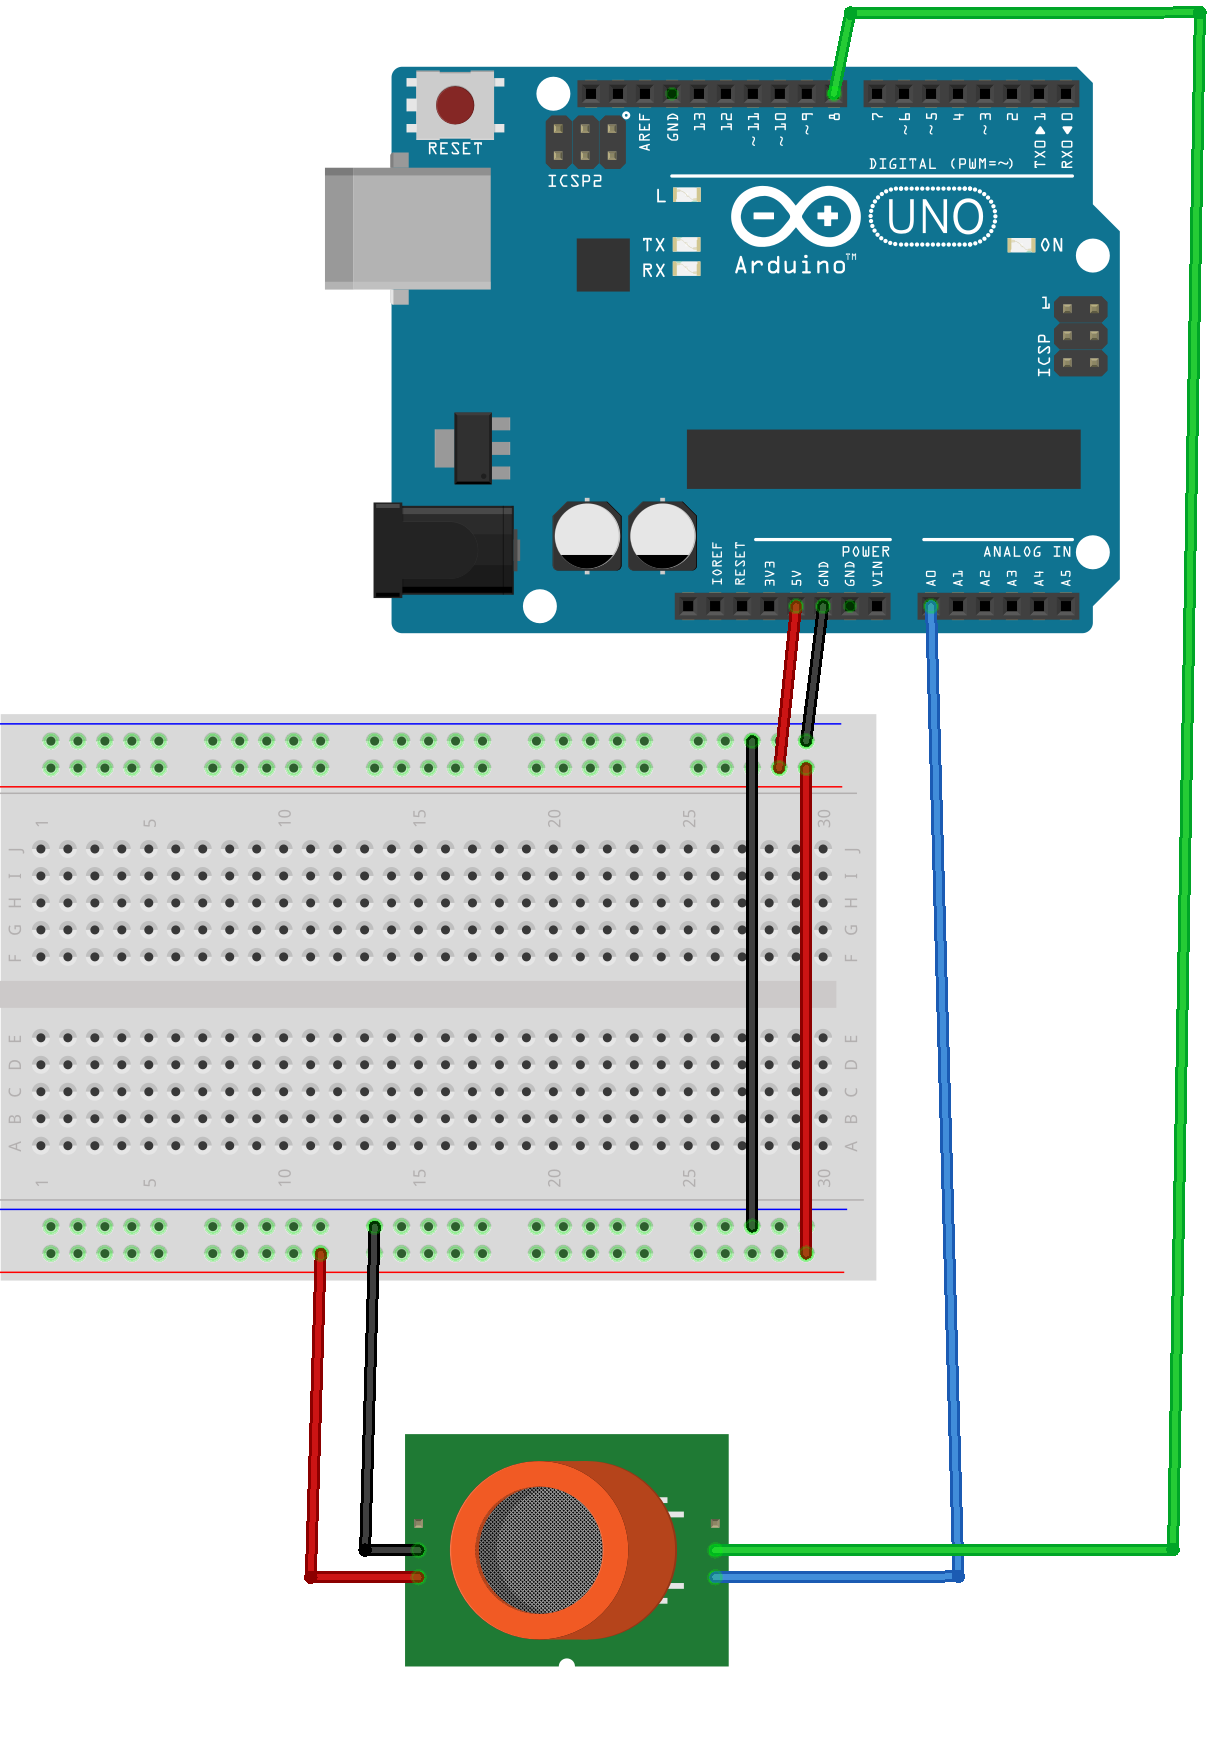
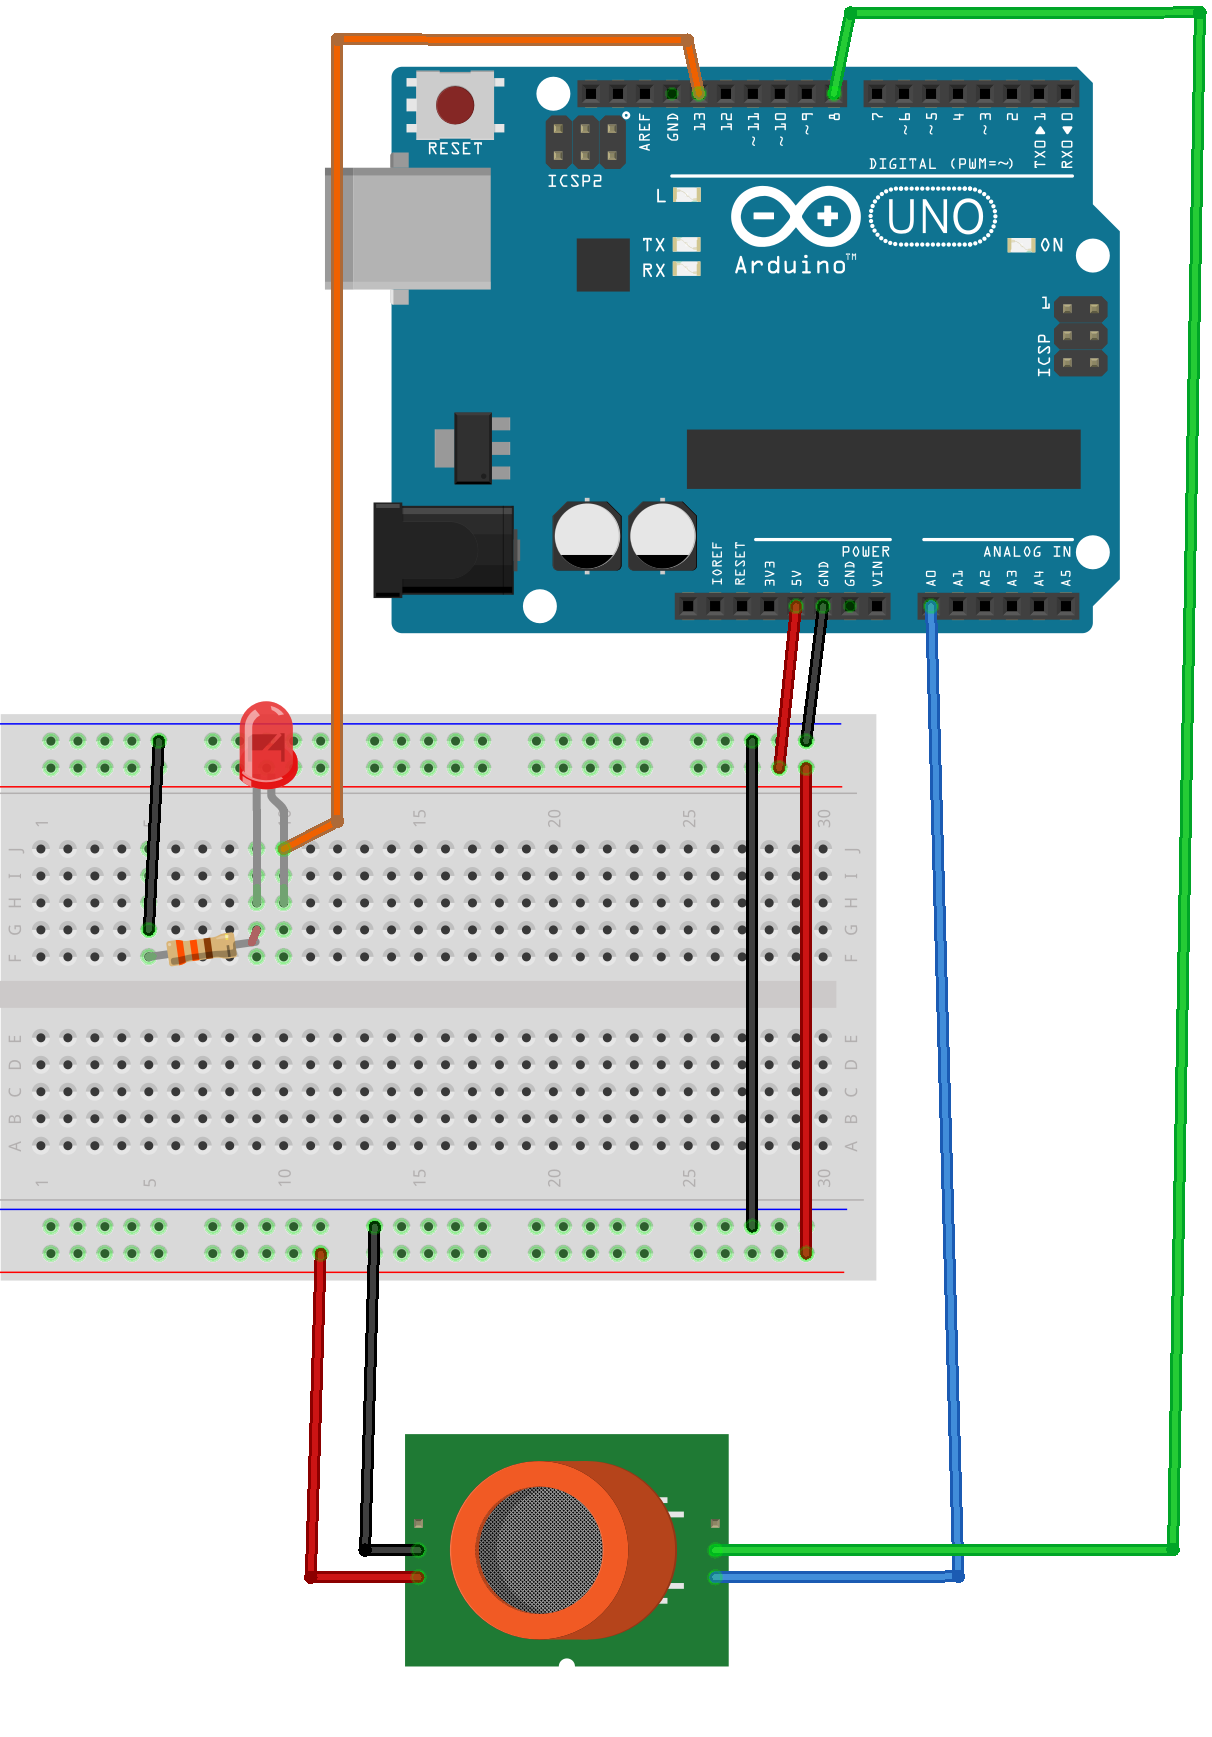
The required set of components for Carbon Monoxide Sensor using Arduino Uno –
1. Arduino Uno
2. MQ-7 Carbon Monoxide Sensor
3. Servo
4. Breadboard
5. Connecting wire
6. 330ohm Resistor
7. LED
8. +5V Power supply
A sketch of the circuit assembly –
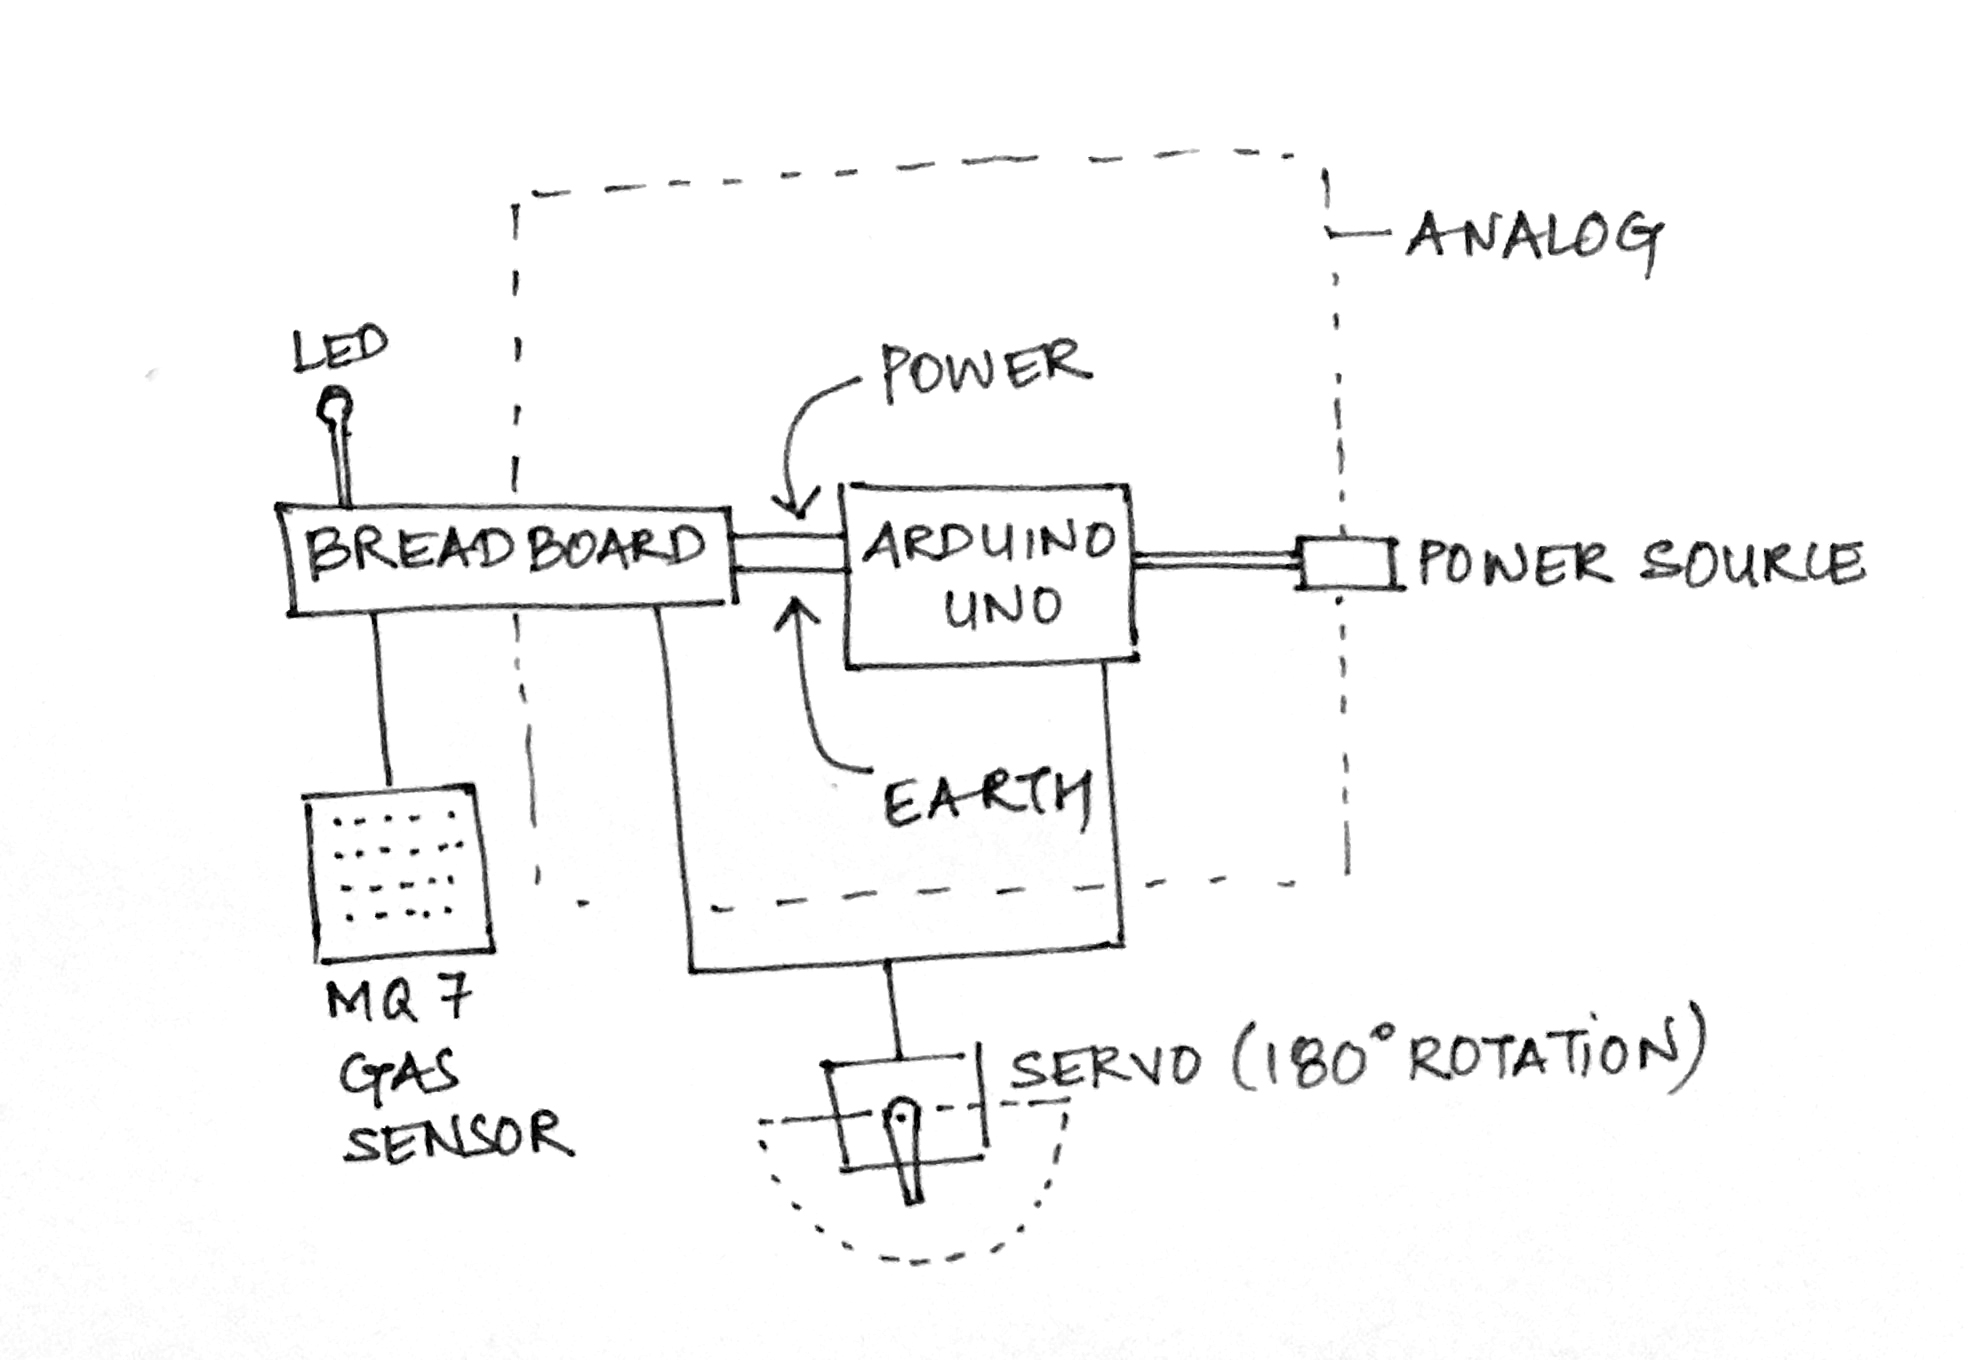
The step-wise process of assembly –
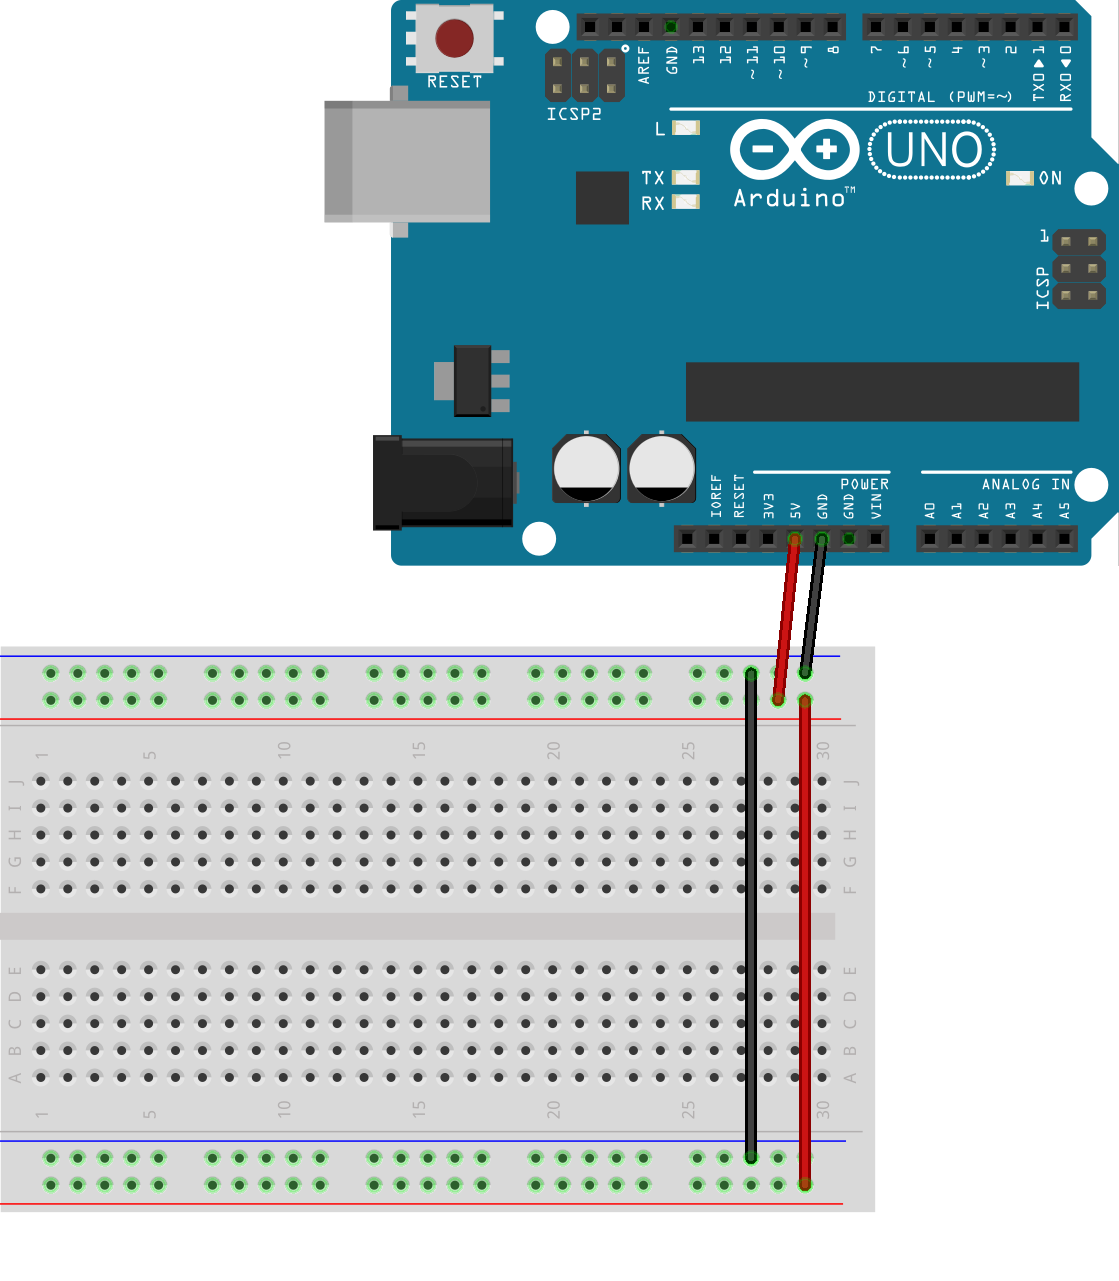
STEP 1:
Connect the bread board and Arduino Uno with a power supply of 5v and ground.
STEP 2:
Connect the MQ-7 Gas sensor to the Arduino Uno in parallel connection to the power supply.
STEP 3:
Connect the Arduino Uno using analog A0 and digital input D8 to the MQ7 gas sensor.
STEP 4:
Connect the LED pin using D13 with 330ohm resistor to the Arduino Uno.
STEP 5:
Connect the Servo using D9 to the LED pin and MQ-7 gas sensor setup to Arduino Uno.
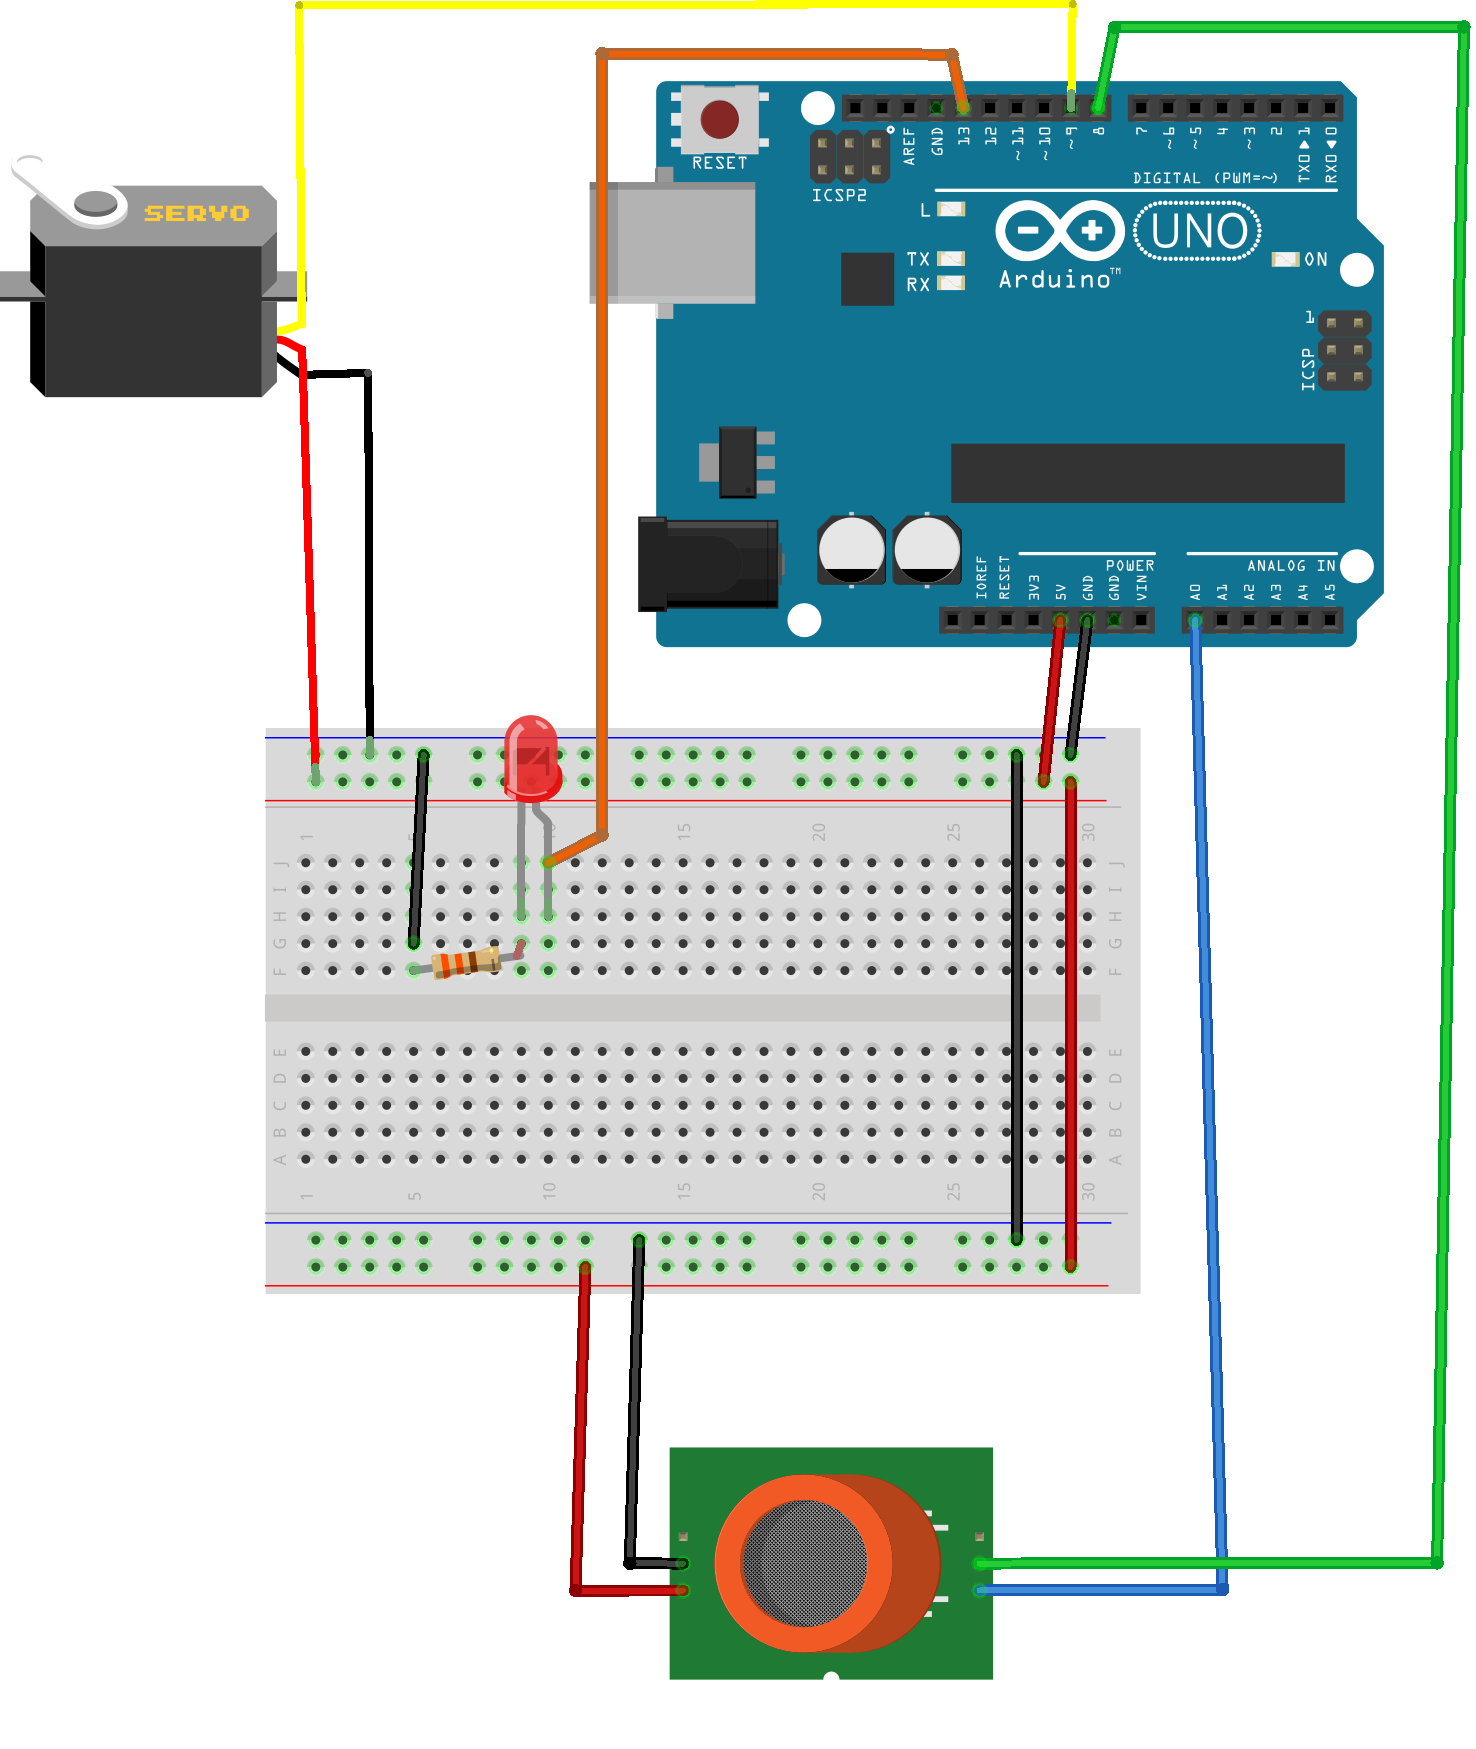
Verify the sketch and upload it. Check the serial monitor for the variation in CO levels.
OUTPUT –
The MQ7 sensor controls the angles of rotation of the servo motor connected to Arduino Uno. If the MQ7 detects a certain value of Carbon Monoxide lower than 250PPM, the servo motor rotates 90 degrees. If the levels are between 150PPM and 250PPM, the servo will move 45 degrees. If MQ7 detects more than 250, the servo will rotate 120 degrees. In addition, the LED would blink in relation with the CO levels sensed by sensor. Higher the CO levels, higher the blinking speed of LED.
Arduino Sketch –
/* Carbon Monoxide Meter Circuit and flashing LED with Arduino */
#include <Servo.h>
Servo myservo; // create servo object to control a servo
const int AOUTpin=0;//the AOUT pin of the CO sensor goes into analog pin A0 of the arduino
const int DOUTpin=8;//the DOUT pin of the CO sensor goes into digital pin D8 of the arduino
const int ledPin=13;//the anode of the LED connects to digital pin D13 of the arduino
int limit;
int gasvalue;
int angle;
int ledState = LOW;
unsigned long preMillis;
unsigned long interval;
void setup() {
myservo.attach(9); // attaches the servo on pin 9 to the servo object
Serial.begin(250000);//sets the baud rate
pinMode(DOUTpin, INPUT);//sets the pin as an input to the arduino
pinMode(ledPin, OUTPUT);//sets the pin as an output of the arduino
}
void loop()
{
gasvalue= analogRead(AOUTpin);//reads the analaog value from the CO sensor’s AOUT pin
limit= digitalRead(DOUTpin);//reads the digital value from the CO sensor’s DOUT pin
Serial.print(“CO value: “);
Serial.println(gasvalue);//prints the CO value
Serial.print(“Limit: “);
Serial.print(limit);//prints the limit reached as either LOW or HIGH (above or underneath)
if (gasvalue<=40) {
myservo.write(180);
interval = 0;
}
if (gasvalue>=41 && gasvalue<= 499) {
angle = map(gasvalue, 41, 499, 179, 1);
myservo.write(angle);
interval = 300 – (gasvalue/2);
}
if (gasvalue>=500) {
myservo.write(0);
interval = 300 – (gasvalue/2);
}
unsigned long currentMillis = millis();
if (currentMillis – preMillis >= interval) {
preMillis = currentMillis;
if (ledState == LOW) {
ledState = HIGH;
} else {
ledState = LOW;
}
digitalWrite(ledPin, ledState);
}
delay (100);
}