Project Description:
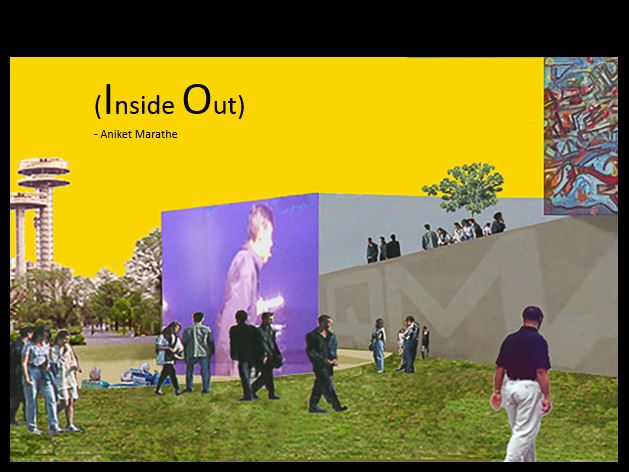
Watching a live game from stadium stands is always a distinct experience. Stadium atmosphere could be experienced only if a person is physically present in the space. Stadium crowd which is a fundamental part of stadium atmospheres brings the game to its liveliness. It gives the required energy to players as well. The entire experience is always so vivid and vibrant that after the game every individual from the crowd leaves the premises with memorable incidences that are closely attached to that particular game. The memories could be happy or sad but they always remain with us and they are remembered every time we visit the same place. The project ‘Inside Out’ aims to revitalize all those individual’s memories attached with the games they personally experienced in the past by creating interactive facade using Arduino Uno and Processing 3.
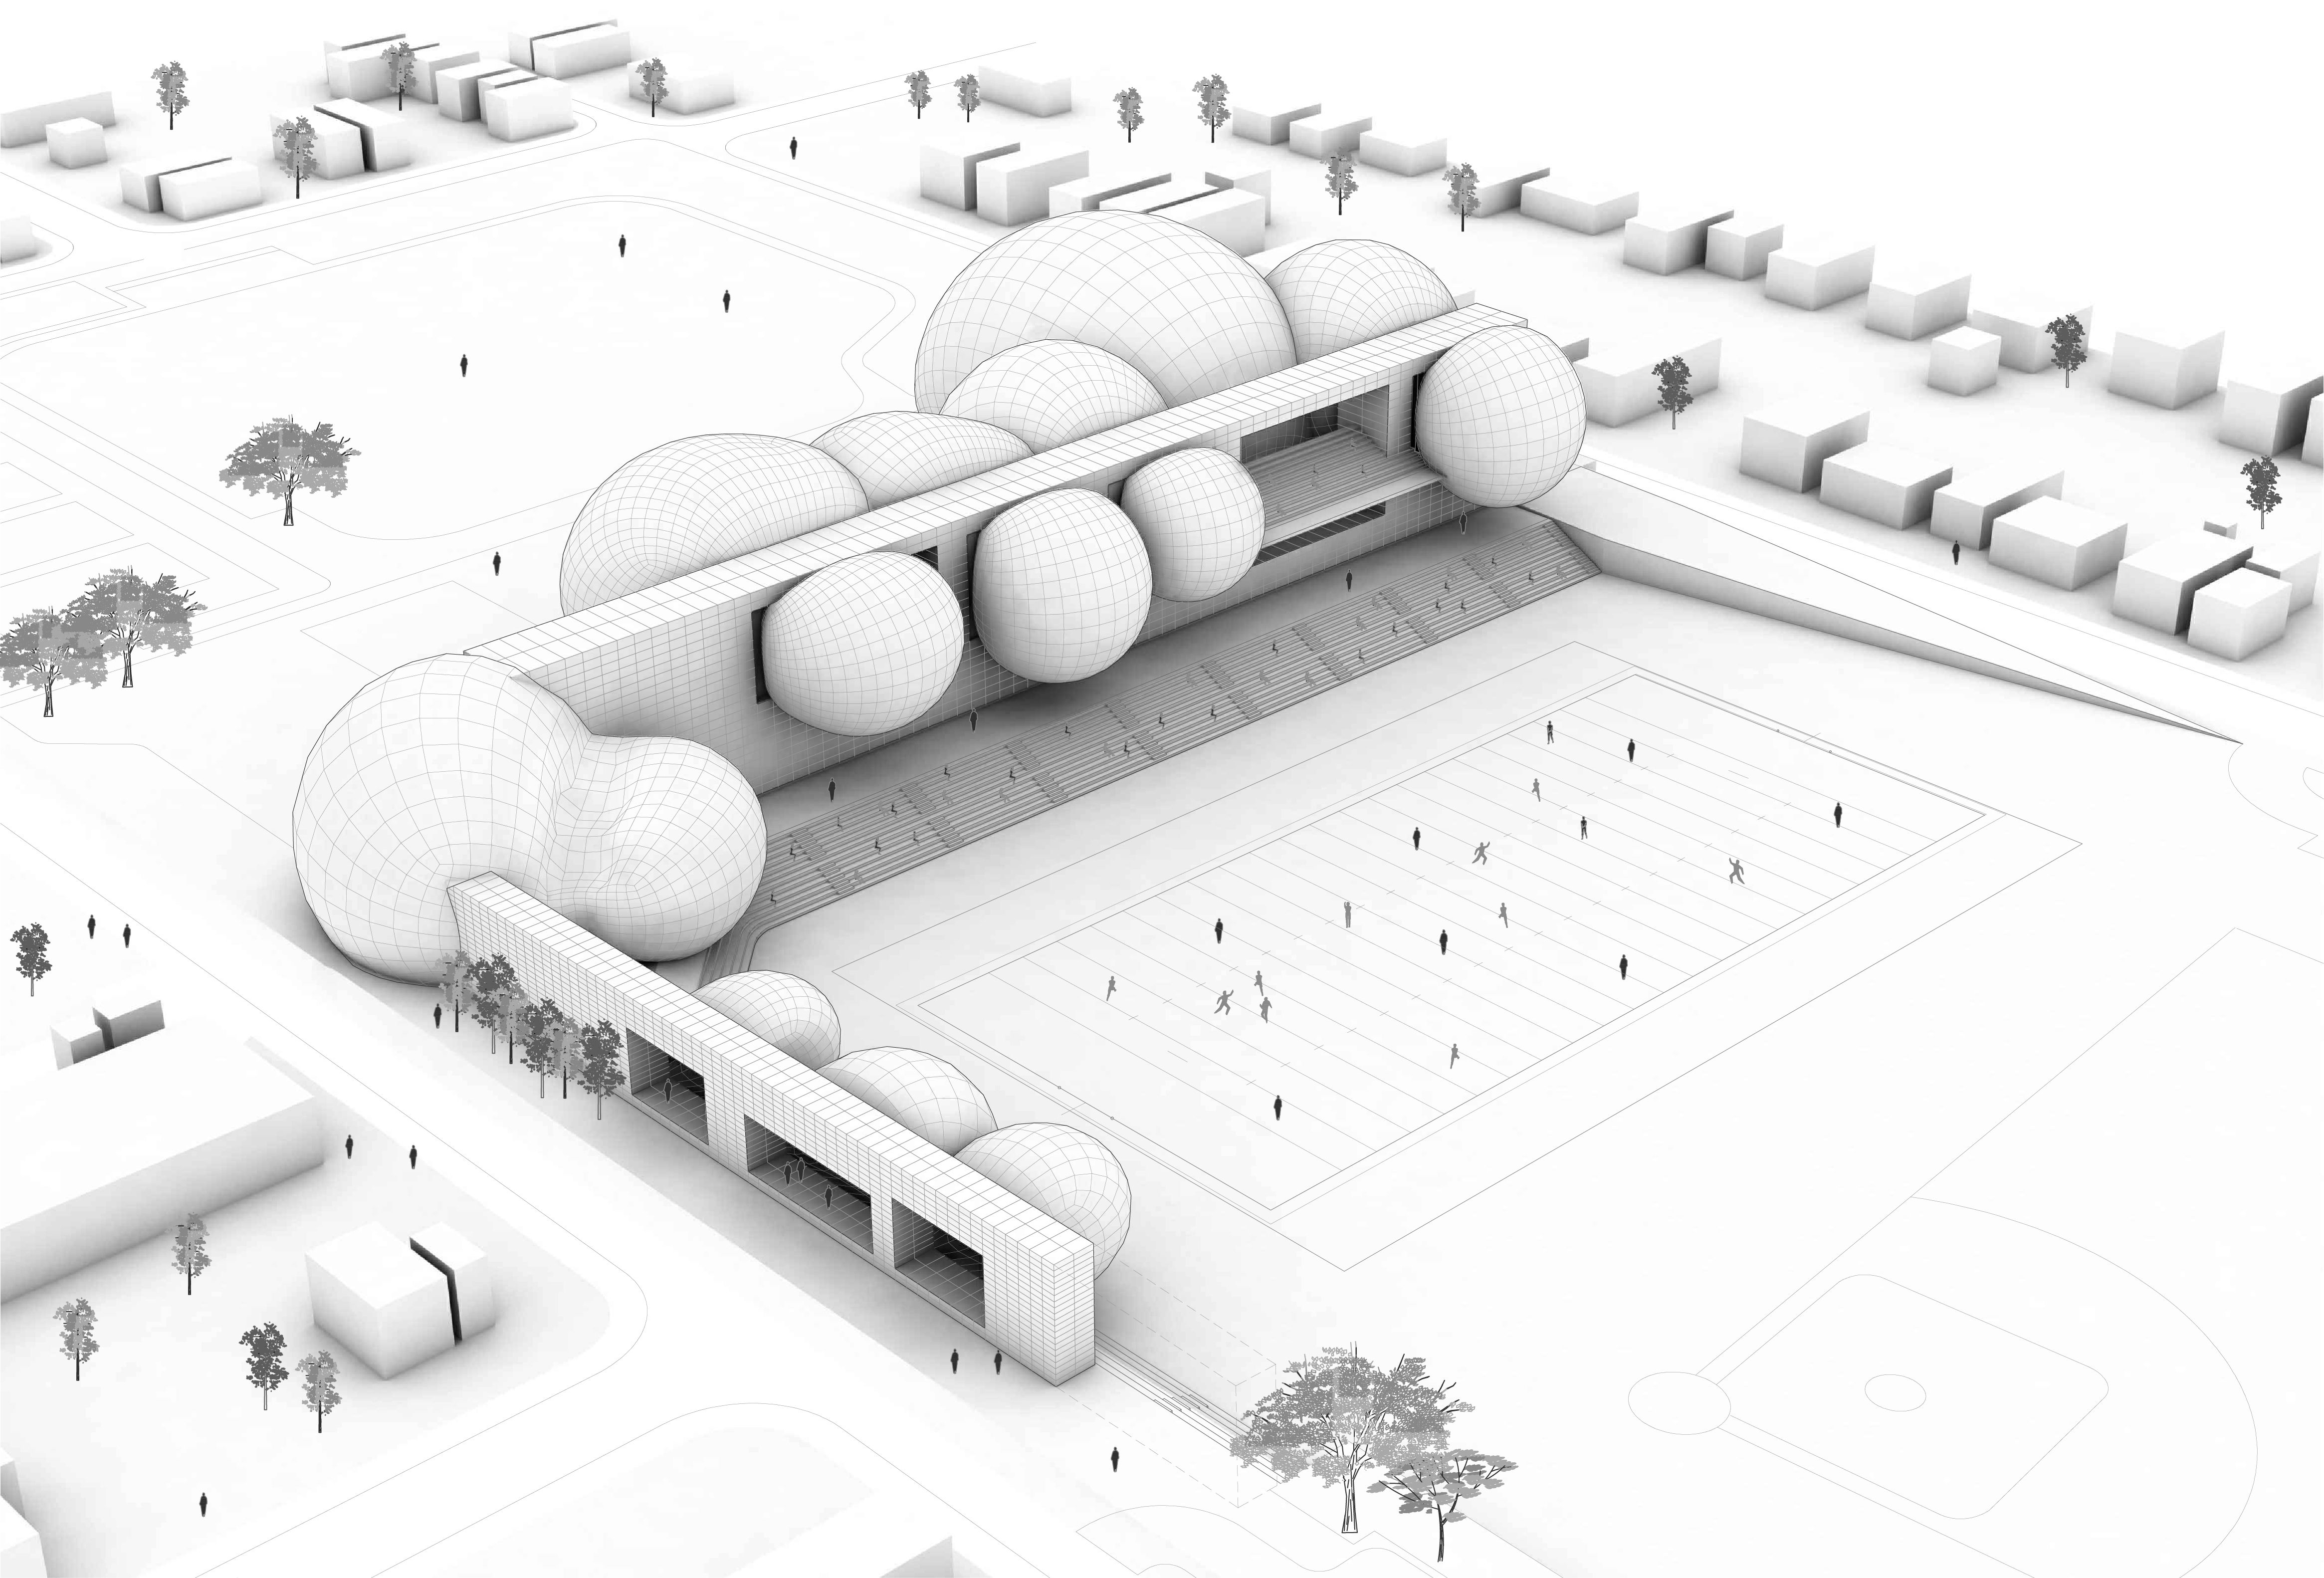
For this project, I am using my studio project from fall 2015 where I have designed a stadium for high-school American Football. The total capacity of the stadium is 6000. The stadium project would serve as a base design. Using Inside Out project, I will try to provide a media interactive skin to the stadium facades.
Bird’s eye view of the stadium design –
Stage ONE – (11/03/2015)
Concept Development –
The idea is to make the stadium as a piece of sculpture that revitalize individual’s memories associated with the stadium, the game etc. A façade that celebrates the moments/memories. It could possibly connect outside world with the stadium’s interior atmosphere by creating a space of belonging. The project would generate augmented interaction of present to past. It aims to explore the relationship between architecture, stadium atmosphere, and visual arts. It combines all of them in one piece to stimulate the ‘Visual memory’ of the place. To practice this concept in real world, the images of games played in the past would be collected from different authenticate sources like official photographers, broadcasting media etc. Those images would be then projected on the facade of the stadium. The facade here would act as a platform and design element to invite people to enter into the complex enhancing their experience with every single entry.
The images which will be projected could consist of different moments that are happy and/or sad. They could be of any individual and/or from group celebration. They might also include players and their expressions.

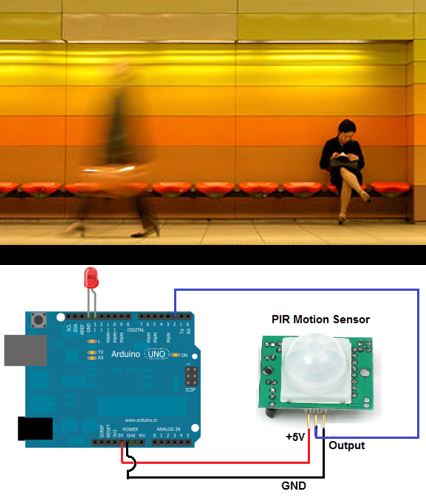
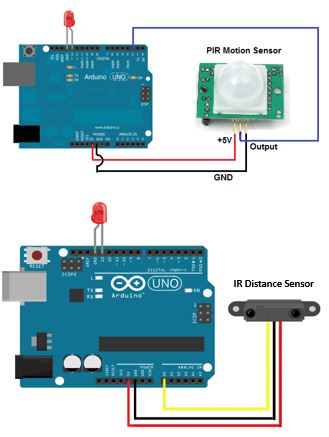
I will be using Arduino Uno for my project. The PIR motion sensor would be used to detect the motion near the stadium entrance. This motion detection information could serve as a ‘input’ to Arduino board. Once the information is received; the source would project the recorded memories on the surface which is an ‘output.’
Stage TWO – (11/24/2015)
Design Development –
As the design concept of the project is to rejuvenate the memories which are specifically attached to the game, I have narrowed down my focus for image projection. The images would be only of players, game’s win/loss instances. This information would be made readily available through external sources. The sources like official photographer for an association or team, broadcasting media would provide required image database.

For input detection process, IR distance sensor could serve as an alternative or another option. IR distance sensor can sense the object’s position; how far/near it is. I can associate these readings with the image projection process to make it user interactive.
Following is a detailed information (source: adafruit.com) on IR distance sensor –
IR Distance Sensor – Includes Cable (100cm-500cm) – GP2Y0A710K0F
Product ID: 1568
Distance Measuring Sensor Unit Measuring distance: 100 to 550 cm Analog output type
GP2Y0A710K0F is a distance measuring sensor unit, composed of an integrated combination of PSD (position sensitive detector), IRED (infrared emitting diode) and signal processing circuit. The variety of the reflectivity of the object, the environmental temperature and the operating duration are not influenced easily to the distance detection because of adopting the triangulation method. This device outputs the voltage corresponding to the detection distance. So this sensor can also be used as a proximity sensor.
This extra-long-range SHARP distance sensor bounces IR off objects to determine how far away they are. It returns an analog voltage that can be used to determine how close the nearest object is. Comes with 6″ long 6-JST interface wire. These sensors are good for detection between 100cm-500cm (1-5 meters / 3-15 feet). The long range makes them a good alternative to sonar sensors.
Please note: the wire colorings are not intuitive! Watch out before wiring! The datasheet has wiring details as well. Connect the blue & red wires both to ground, the black & yellow wires both to 5VDC power, and read the analog signal from the green wire. The analog voltage out will range from 3V when an object is about 100cm away and 1.4V when the object is 500cm away. For a full graph, showing the distance to analog range, check the datasheet below.
These sensors tend to be a little noisy, we suggest soldering/connecting the included 220uF capacitor to the same place you connect the wires, to provide some filtering on the power supply. Connect the + pin of the capacitor to the Vcc wire connection, and the – pin of the capacitor to the GND wire connection.
Technical details –
Dimensions:
- Dimensions: 58mm x 17.6mm x 22.5mm
- Weight: 11g with cable
Arduino code for IR distance sensor –
int sensorpin = 0; // analog pin used to connect the sharp sensor
int val = 0; // variable to store the values from sensor(initially zero)
void setup()
{
Serial.begin(9600); // starts the serial monitor
}
void loop()
{
val = analogRead(sensorpin); // reads the value of the sharp sensor
Serial.println(val); // prints the value of the sensor to the serial monitor
delay(100); // wait for this much time before printing next value
}
Instead of simply projecting collected images from past games, I would use Processing 3 to create pixel based illustrations that could be projected on the building skin. Coding in Processing 3 would help to morph images into graffiti which could add the another layer of aesthetics in the setting.
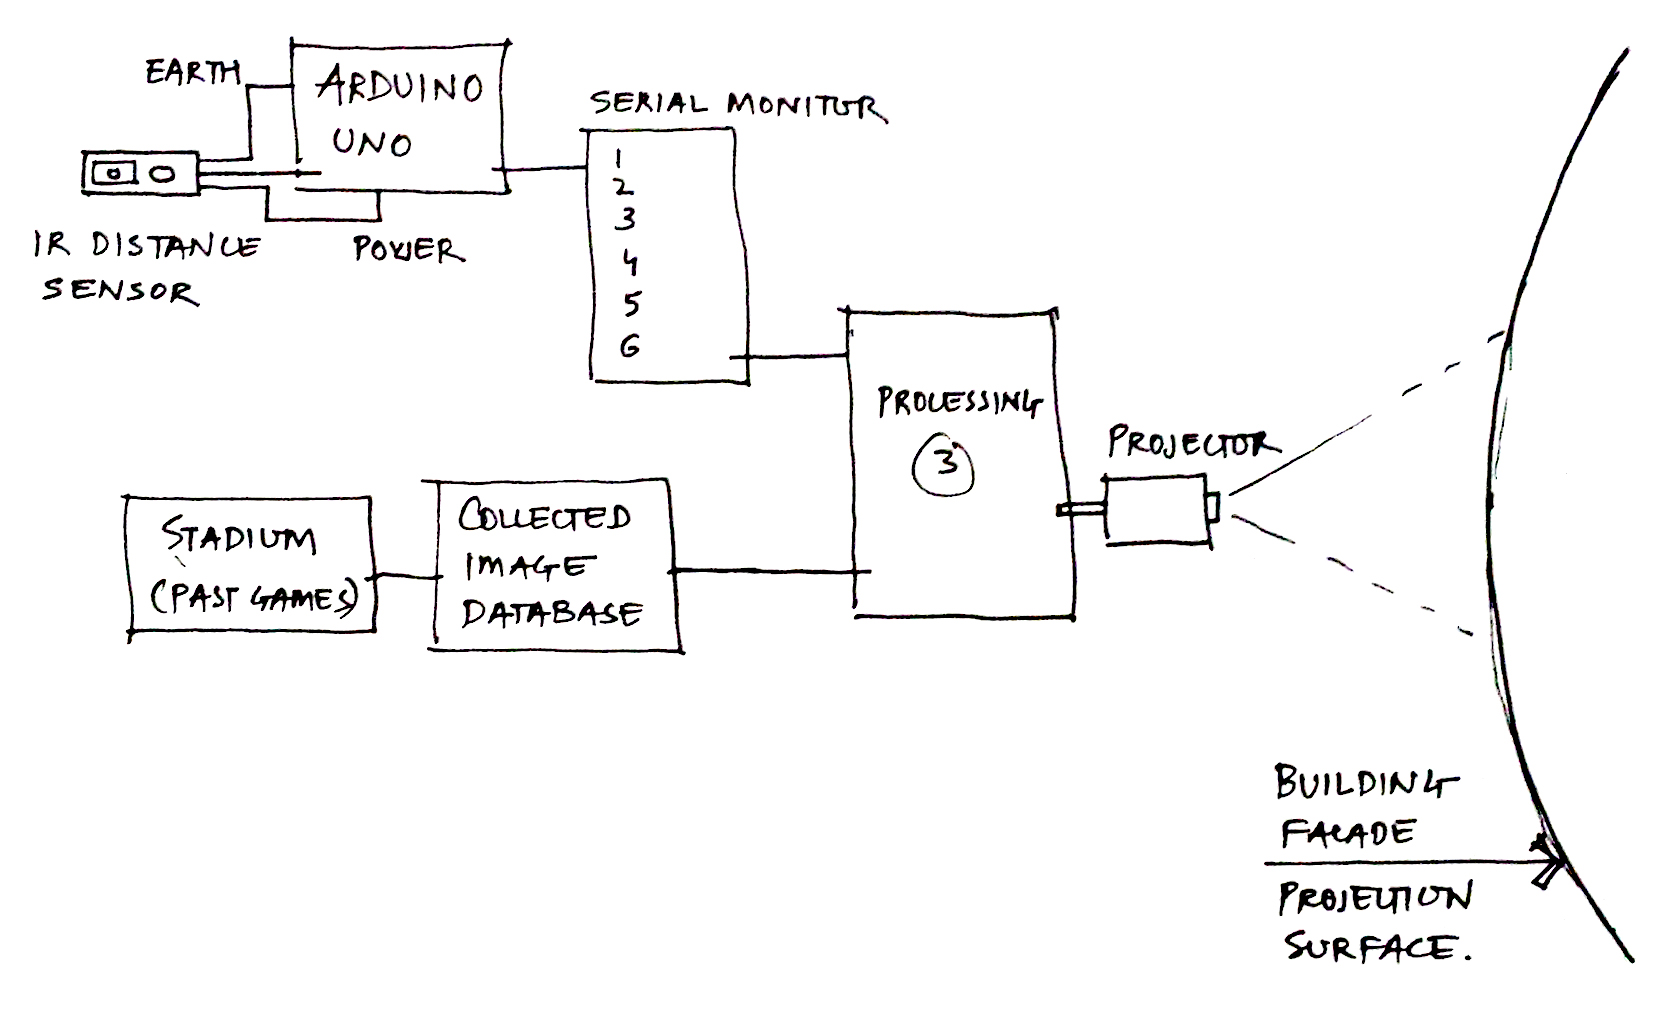
Following sketch explains the conceptual flow of the project –
Stage Three – (12/15/2015)
Final design scheme –
In my final scheme, I have used Arduino Uno, IR distance sensor, Processing 3 as main three key components. As per my project flow sketch from stage two, IR distance sensor is connected to Arduino Uno board. IR sensor detects the objects distance. Processing 3 which is also connected to Arduino Uno’s serial monitor’s readings- process the images to create a pixel graffiti. Processed image’s pixel size would vary depending on objects distance from IR sensor. Closer the object to IR sensor, bigger would be the pixel size of the image. Arduino and Processing 3 are connected together using import processing.serial.*; library.
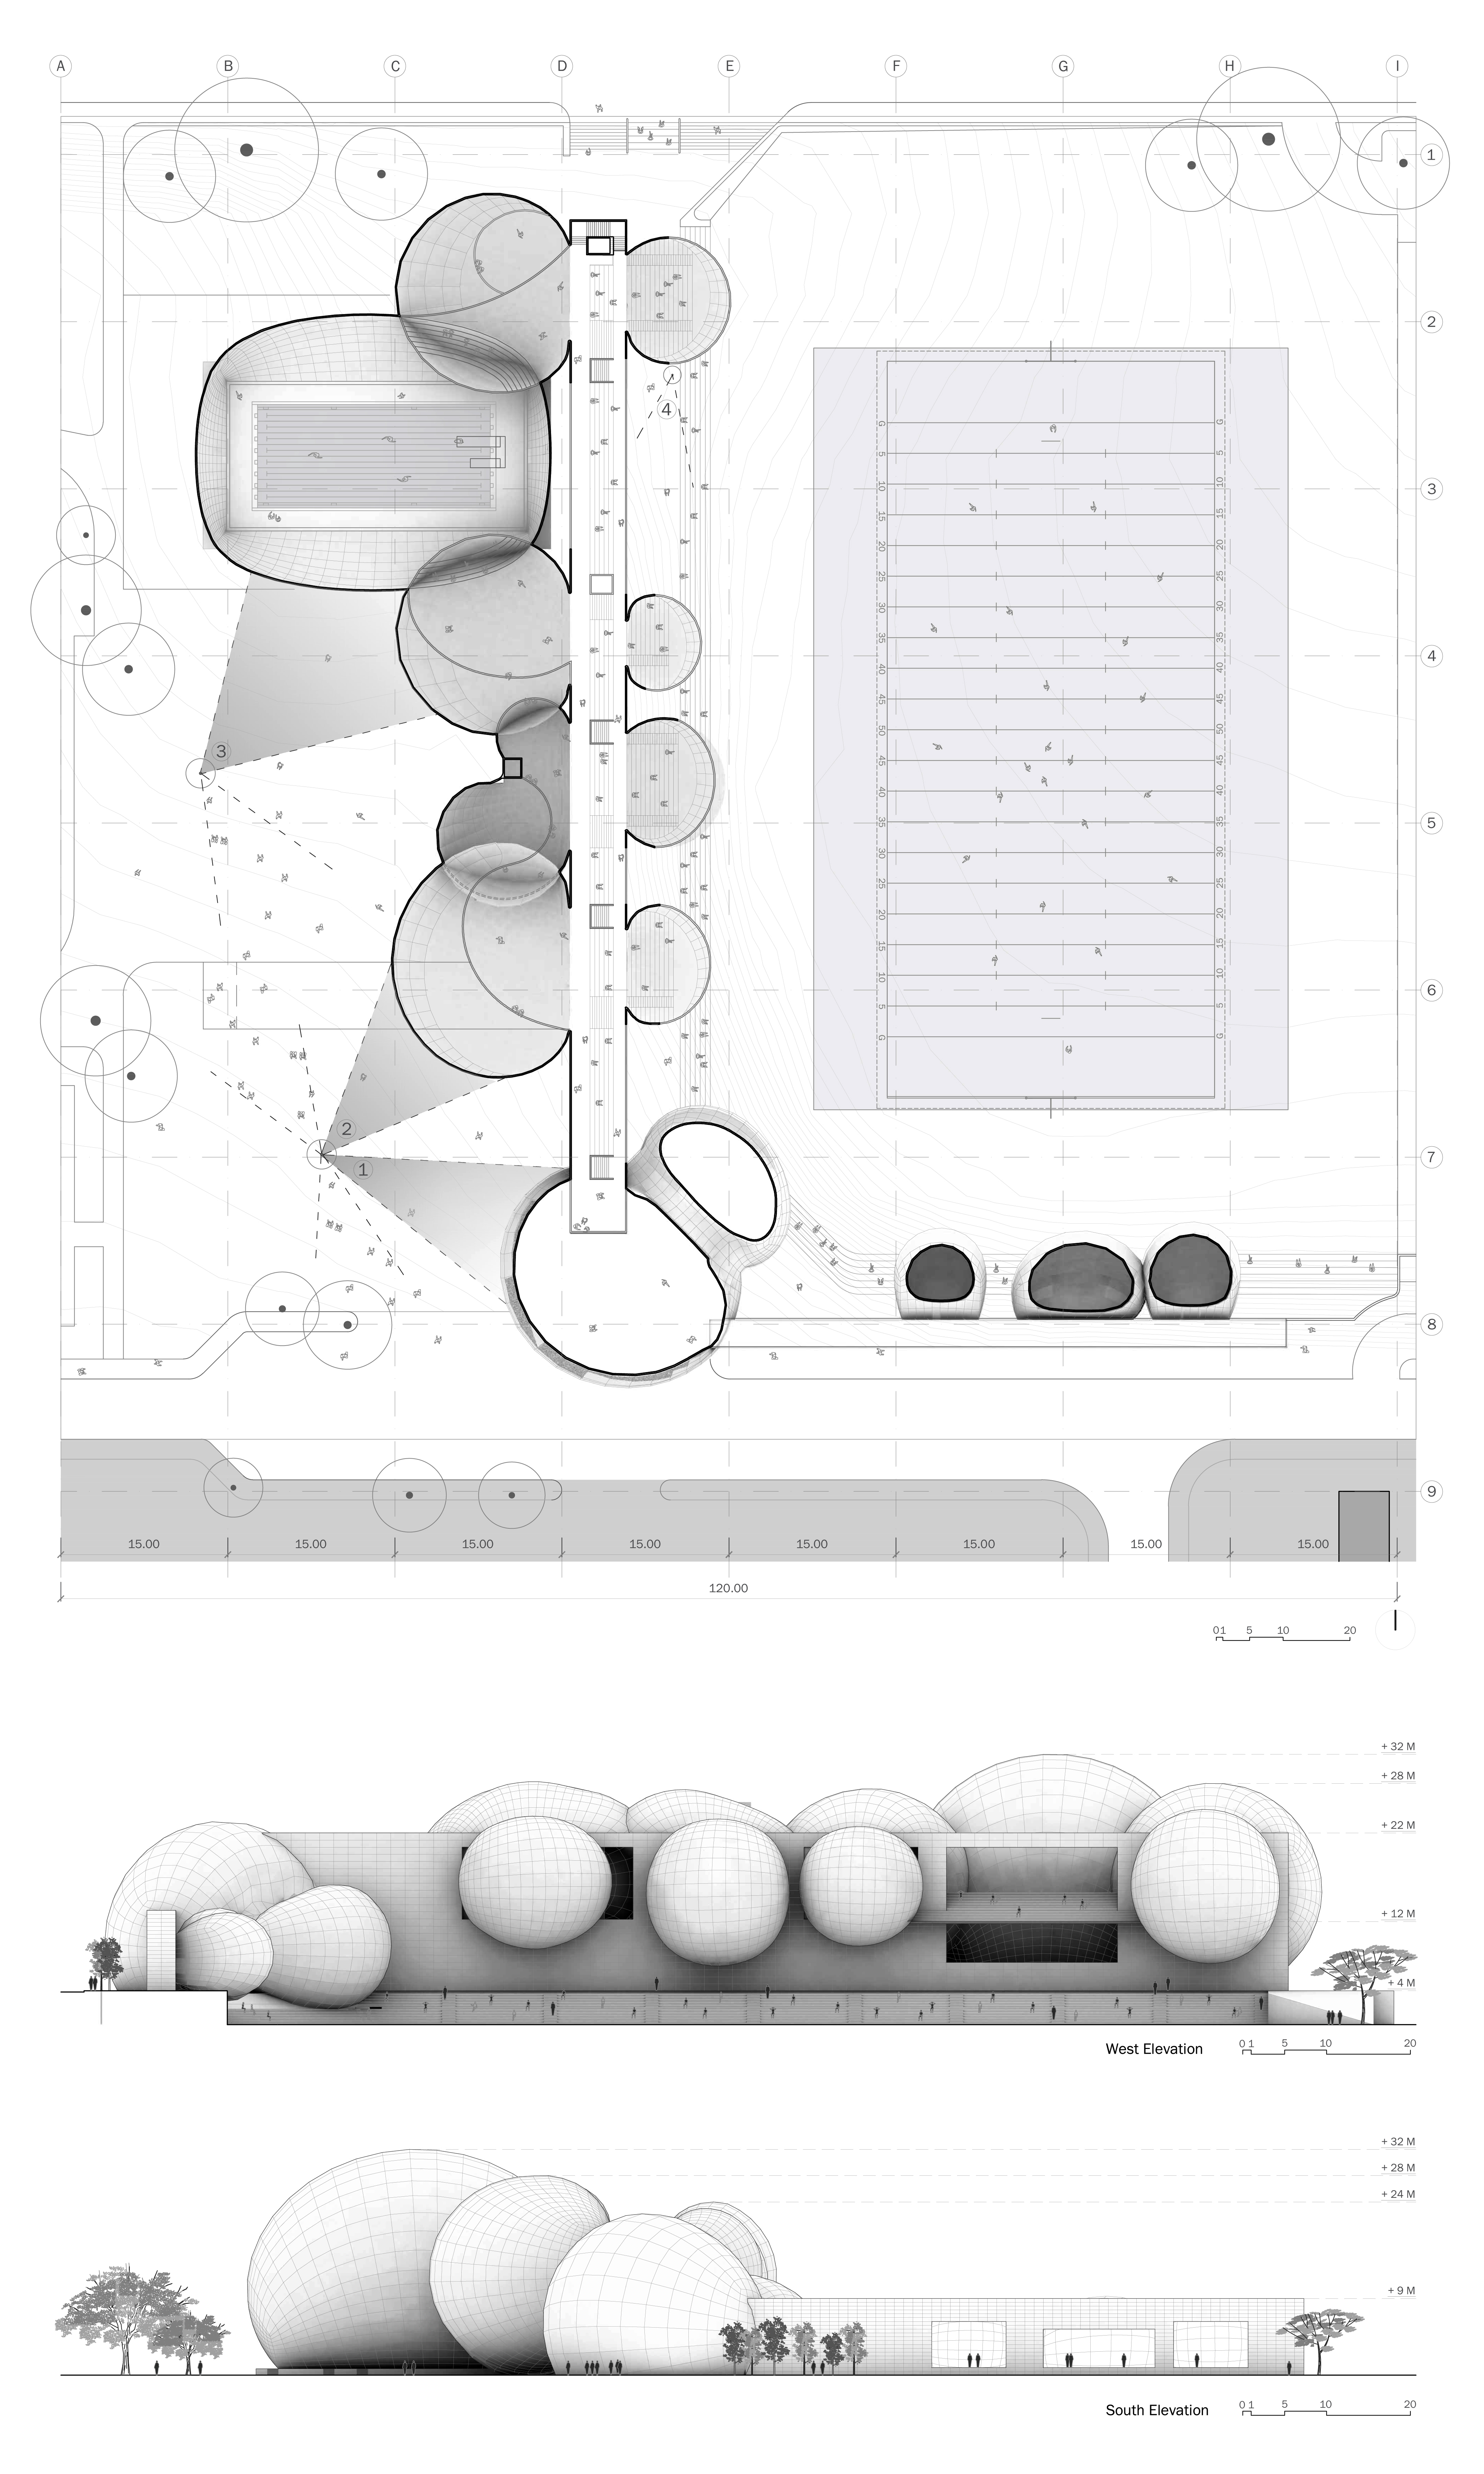
I am using 4 IR sensors at particular locations of site. Following plan elucidates those positions. Design elevations and section could serve as a supplementary information.
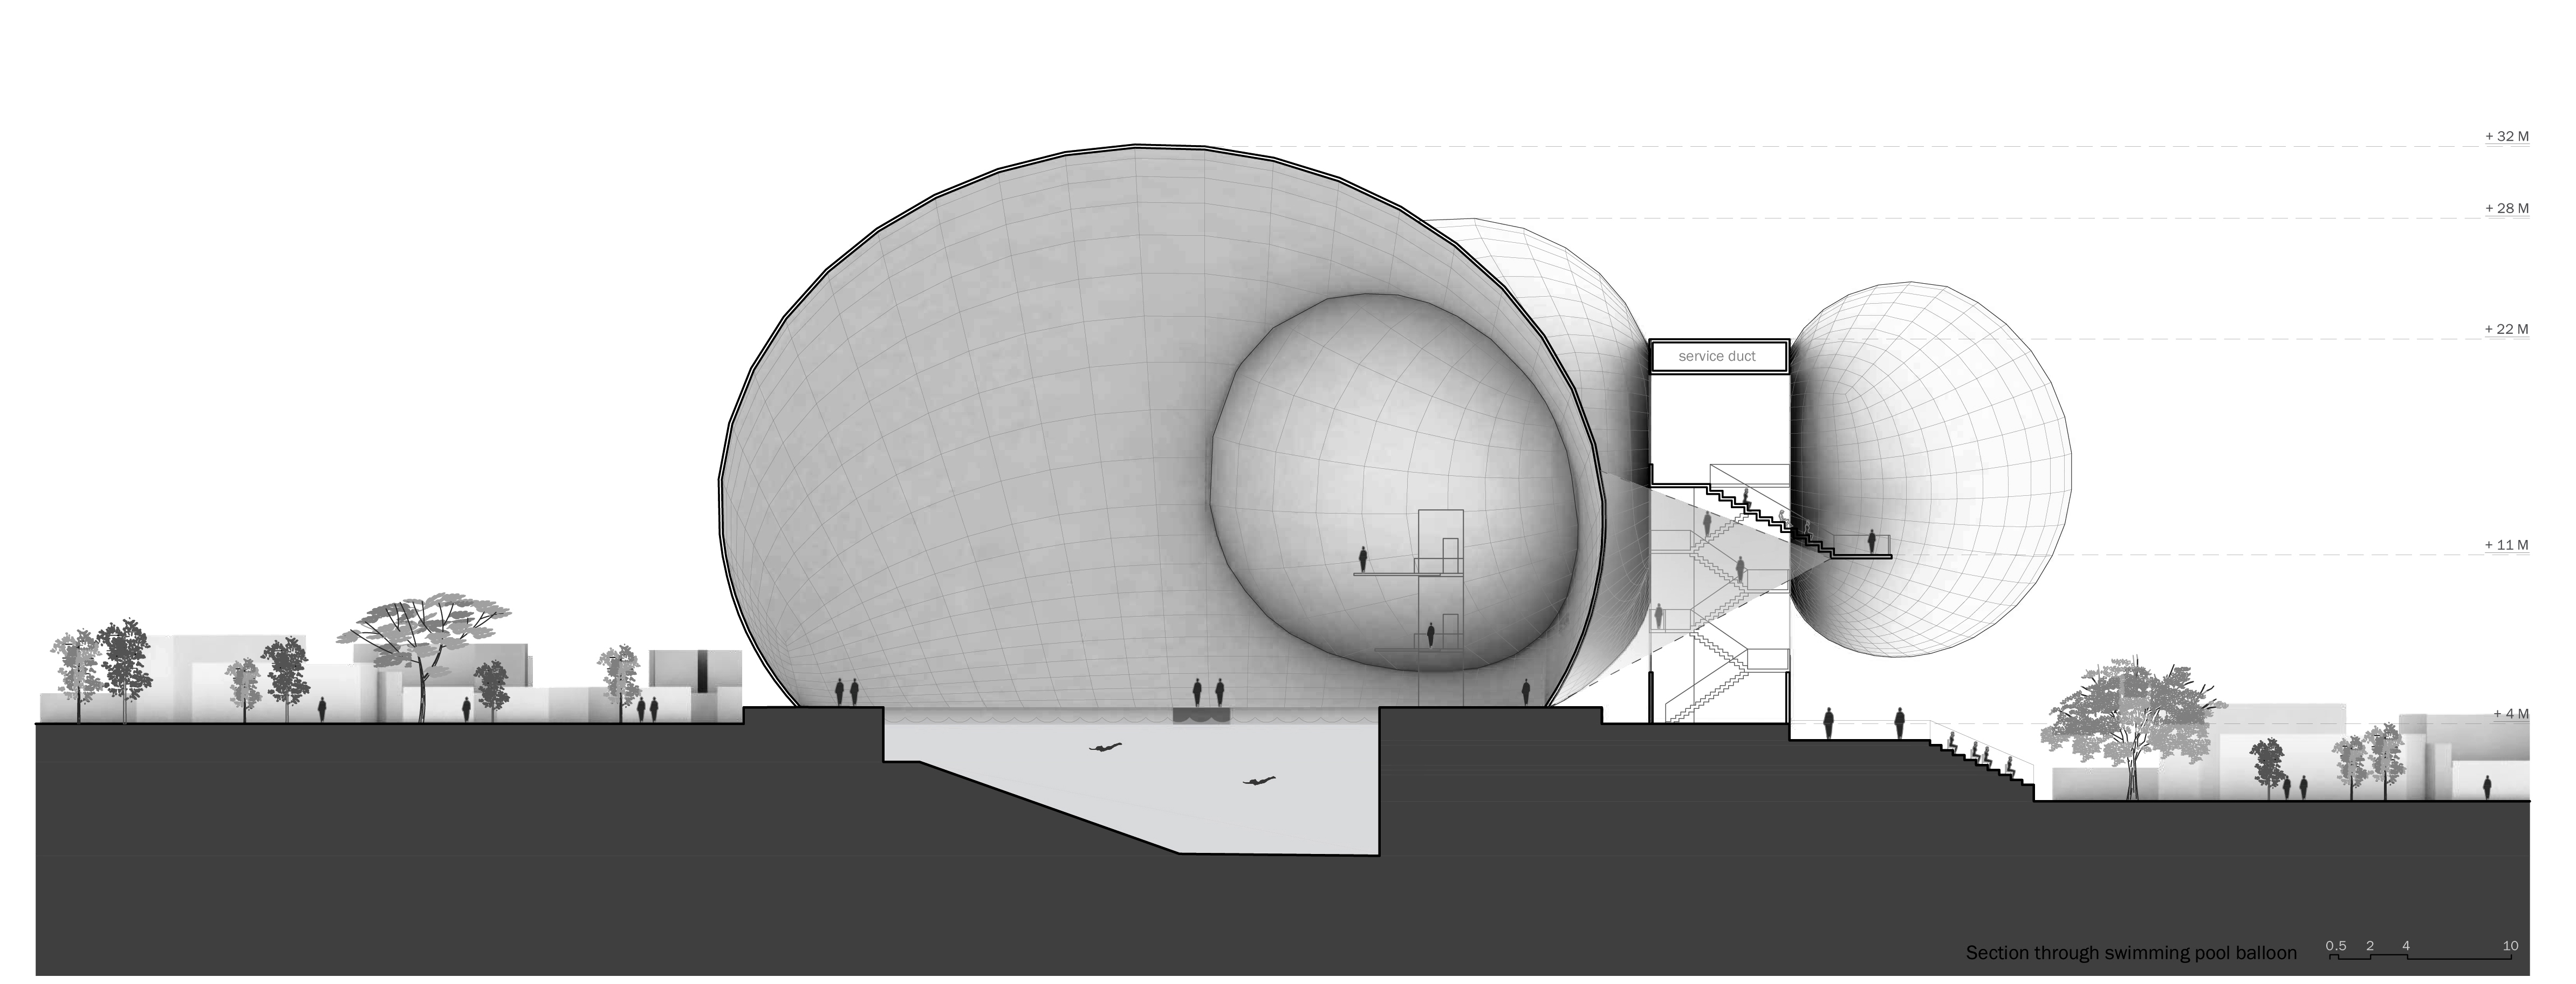
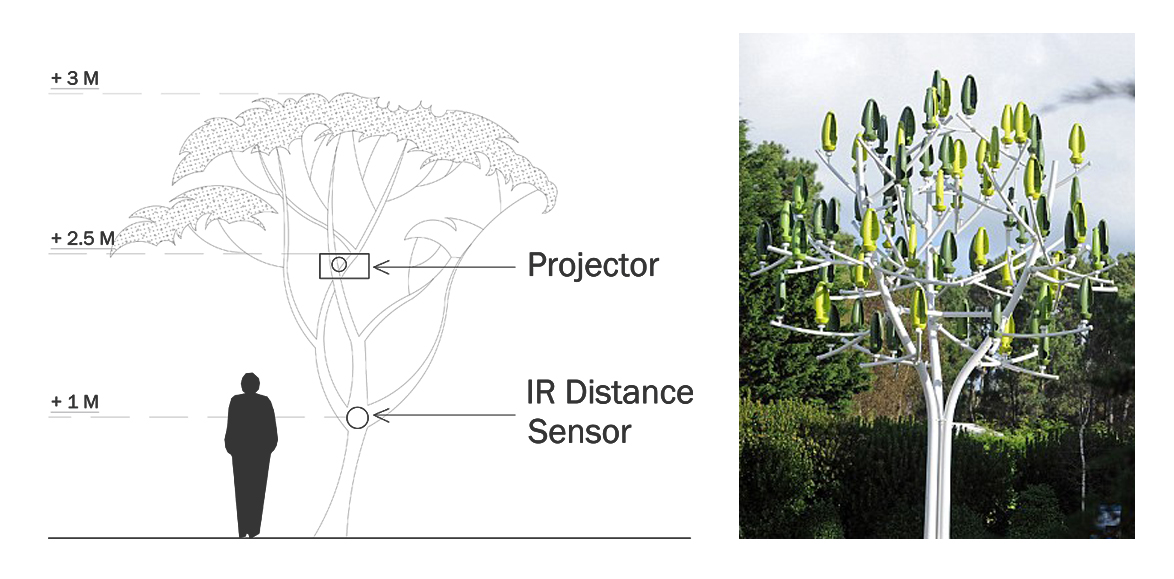
Following image illustrates the exact location of IR sensor and projector in elevation. The projection tree is imagined as a piece of sculpture. The projector could be camouflaged or placed inside a pod. (Look at the right hand side picture) –
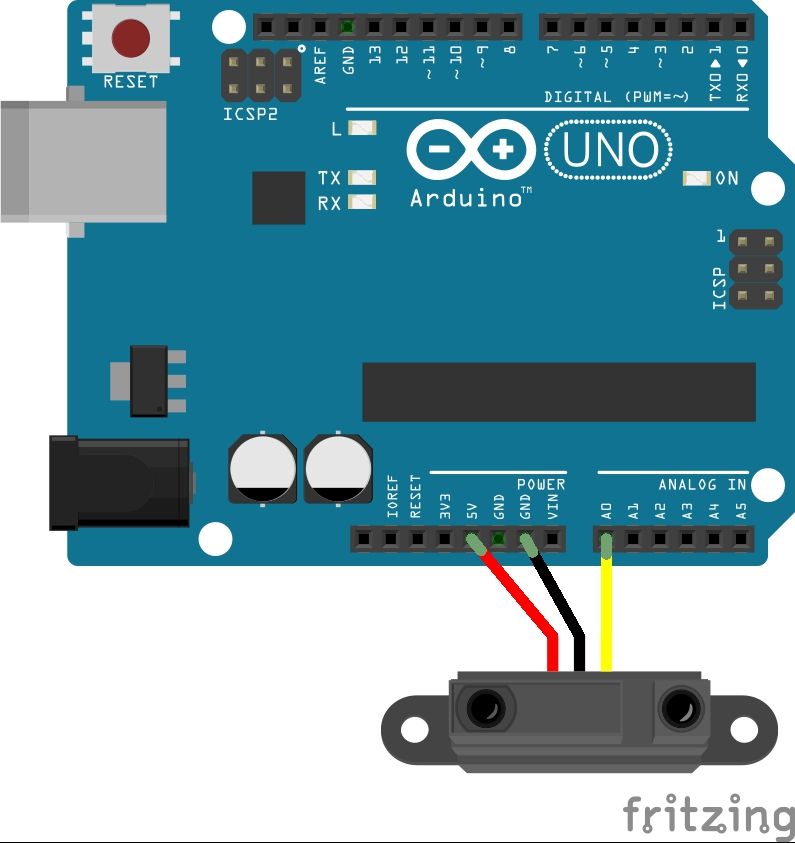
Arduino Uno circuit diagram (created using Fritzing) –
Code for Ardunio –
int sensorpin = 0; // analog pin used to connect the sharp sensor
int val = 0; // variable to store the values from sensor(initially zero)
void setup()
{
Serial.begin(9600); // starts the serial monitor
}
void loop()
{
val = analogRead(sensorpin);// reads the value of the sharp sensor
val = map(val, 0, 900, 0, 100);
analogWrite(9, val);
Serial.println(val); // prints the value of the sensor to the serial monitor
delay(100); // wait for this much time before printing next value
}
Code for Processing –
import processing.serial.*;
int maxImages = 5; // Total # of images
int imageIndex = 0; // Initial image to be displayed is the first
boolean isPlaying = false;
PImage[] images = new PImage[maxImages];
int lf = 10; // Linefeed in ASCII
int value;
int steps=10;
String myString = null;
Serial myPort; // The serial port
void setup()
{
FullScreen();
smooth();
for (int i = 0; i < images.length; i ++ ) {
images[i] = loadImage( “a” + i + “.jpg” );
}
//println(Serial.list());
myPort = new Serial(this, Serial.list()[0], 9600);
myPort.clear();
myString = myPort.readStringUntil(lf);
myString = null;
}
void draw ()
{
while (myPort.available() > 0) {
myString = myPort.readStringUntil(lf);
if (myString != null) {
value = int( myString.trim() );
println(value);
}
}
background (#57385c);
int s = round (map(value, 0, 900, 3, 700 ));
println(s);
steps = s;
int x = 0;
while (x < width)
{
int y = 0;
while (y < height)
{
color c = images[imageIndex].get (x, y);
float helligkeit = brightness (c);
float d = map (helligkeit, 0, 255, 1, steps);
fill (c);
noStroke();
ellipse (x+steps/2, y+steps/2, d, d);
y = y+ steps;
}
x = x+steps;
}
// Only cycle if isPlaying is true
if (isPlaying == true) {
// increment image index by one each cycle
// use modulo ” % “to return to 0 once the end of the array is reached
imageIndex = (imageIndex + 1) % images.length;
delay(5000);
}
}
// Only happens when you release key
void keyReleased() {
if (key == ‘0’) {
imageIndex = 0;
}
else if (key == ‘1’) {
imageIndex = 1;
}
else if (key == ‘5’) {
imageIndex = 5;
}
// Toggle isPlaying with space bar
else if (key == ‘ ‘ && isPlaying == false) {
isPlaying = true;
}
else if (key == ‘ ‘ && isPlaying == true) {
isPlaying = false;
}
}
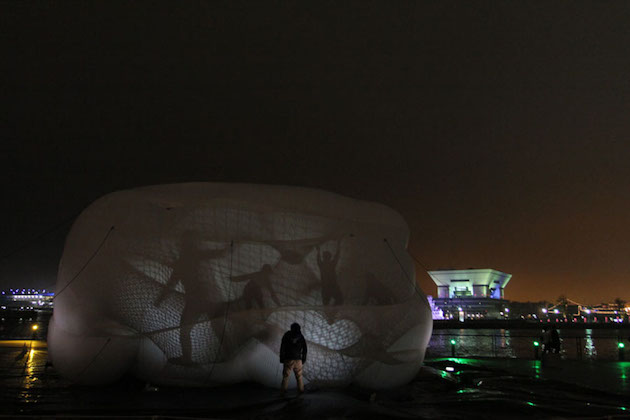
Prototype –
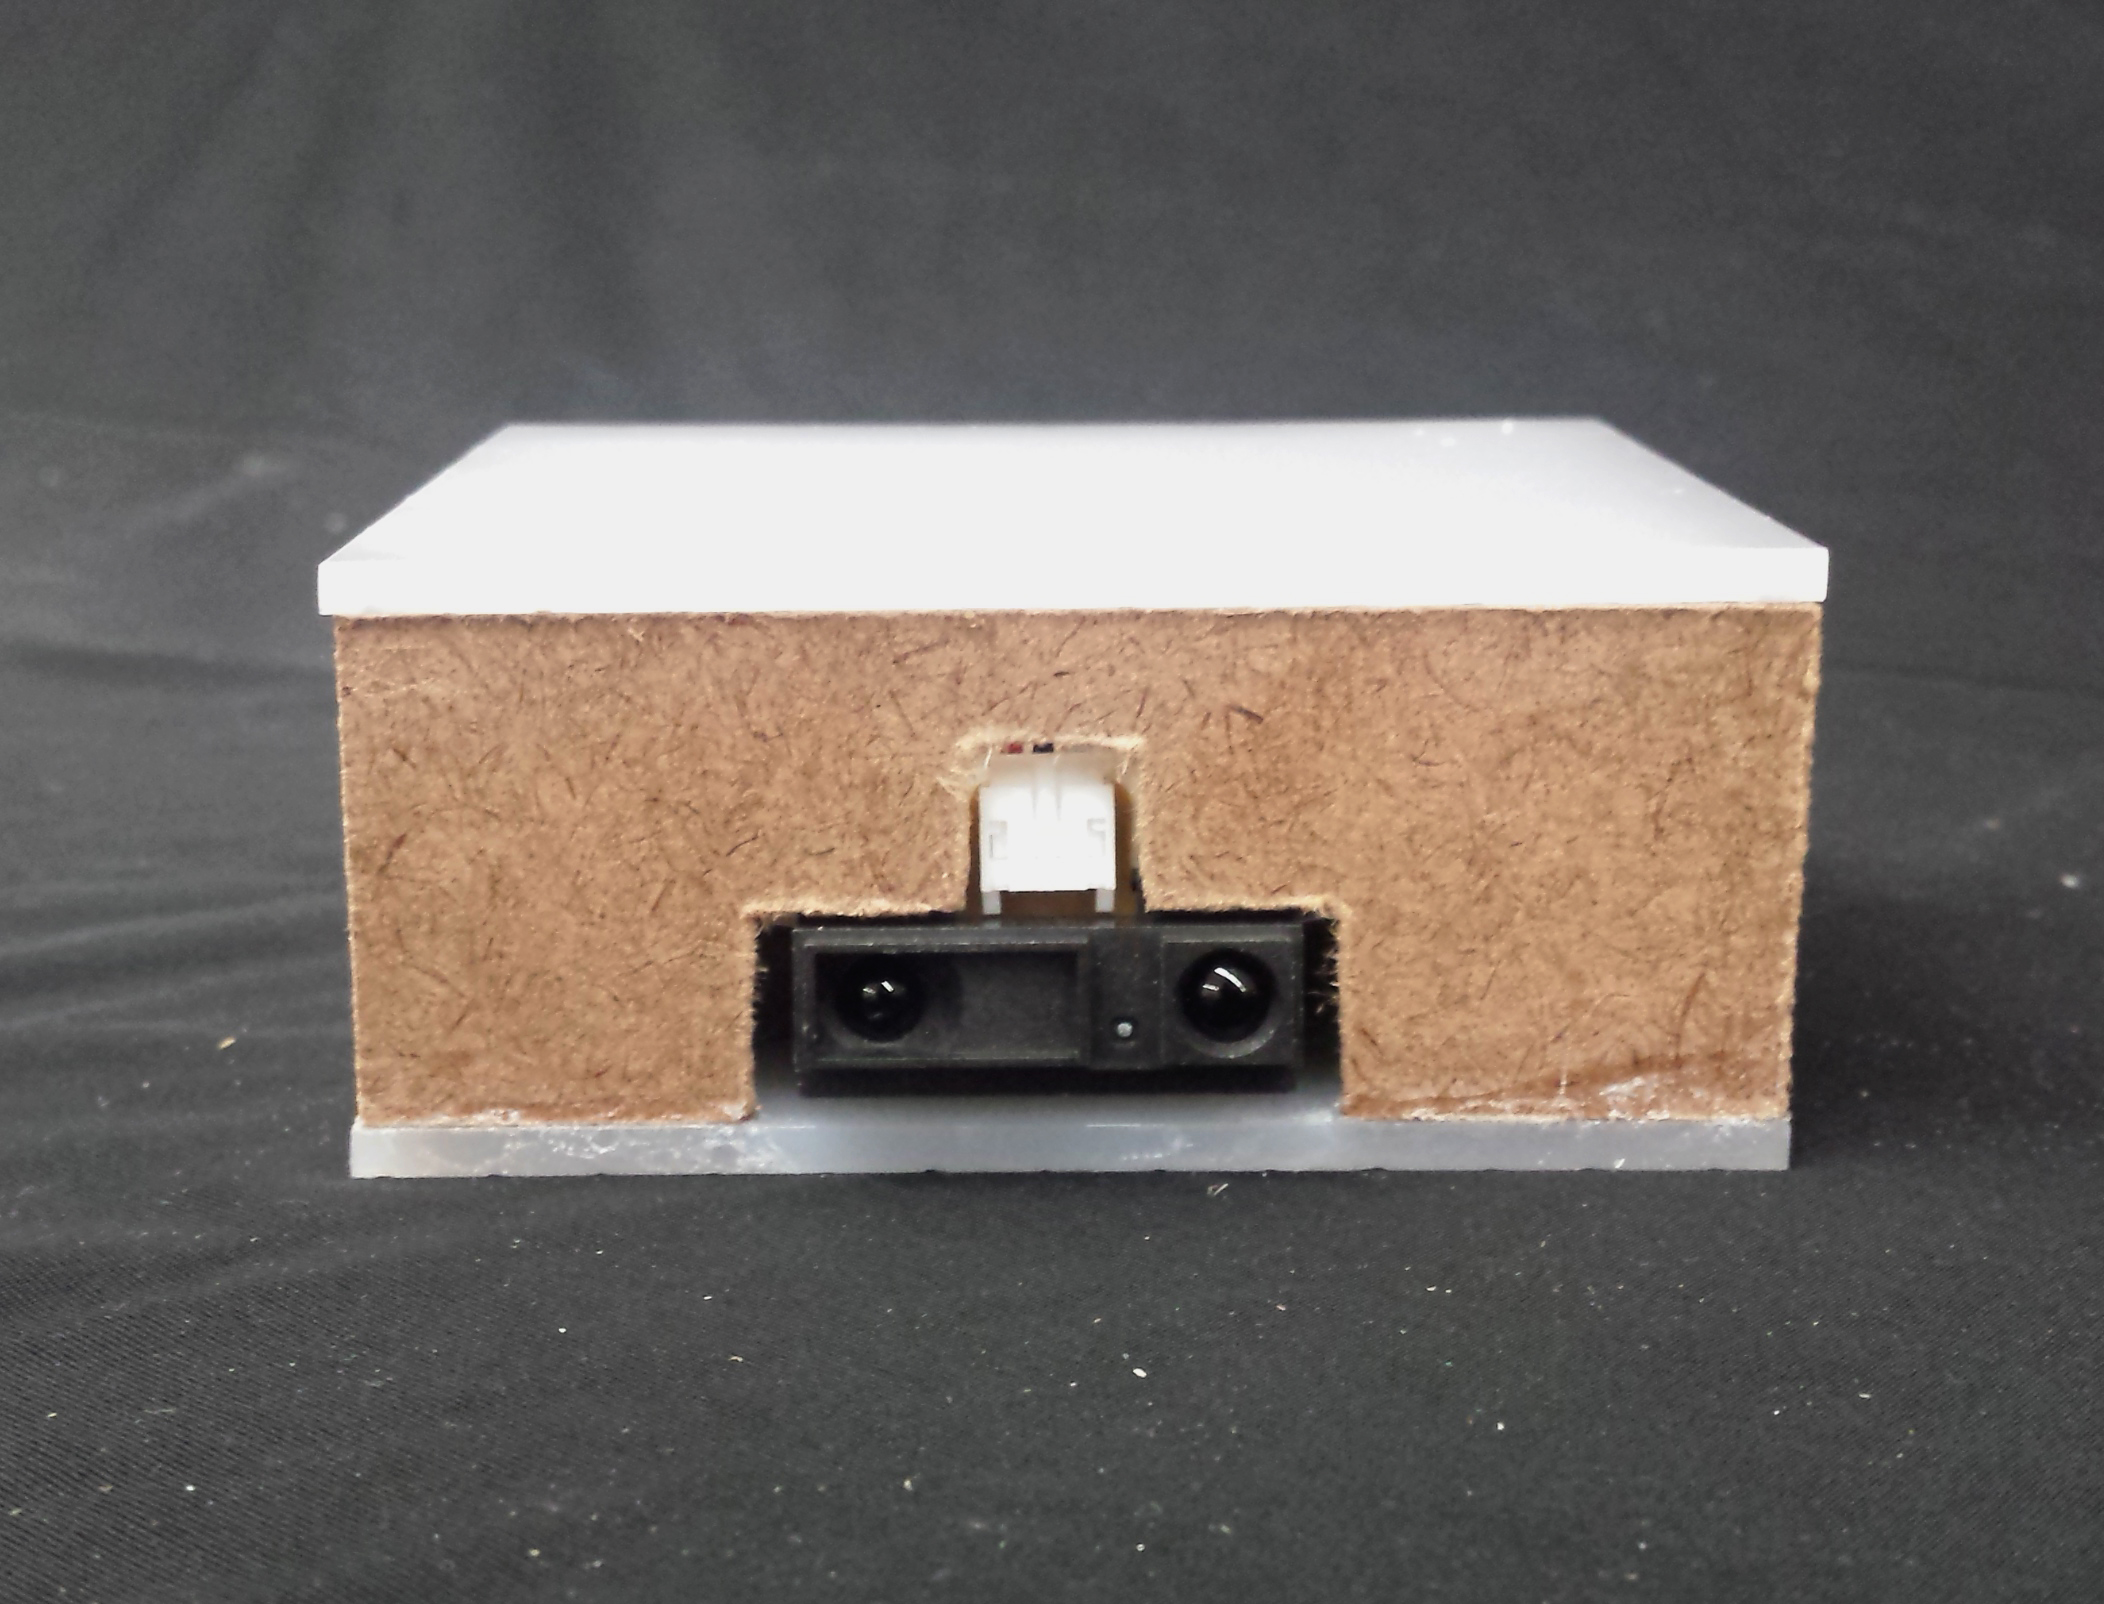
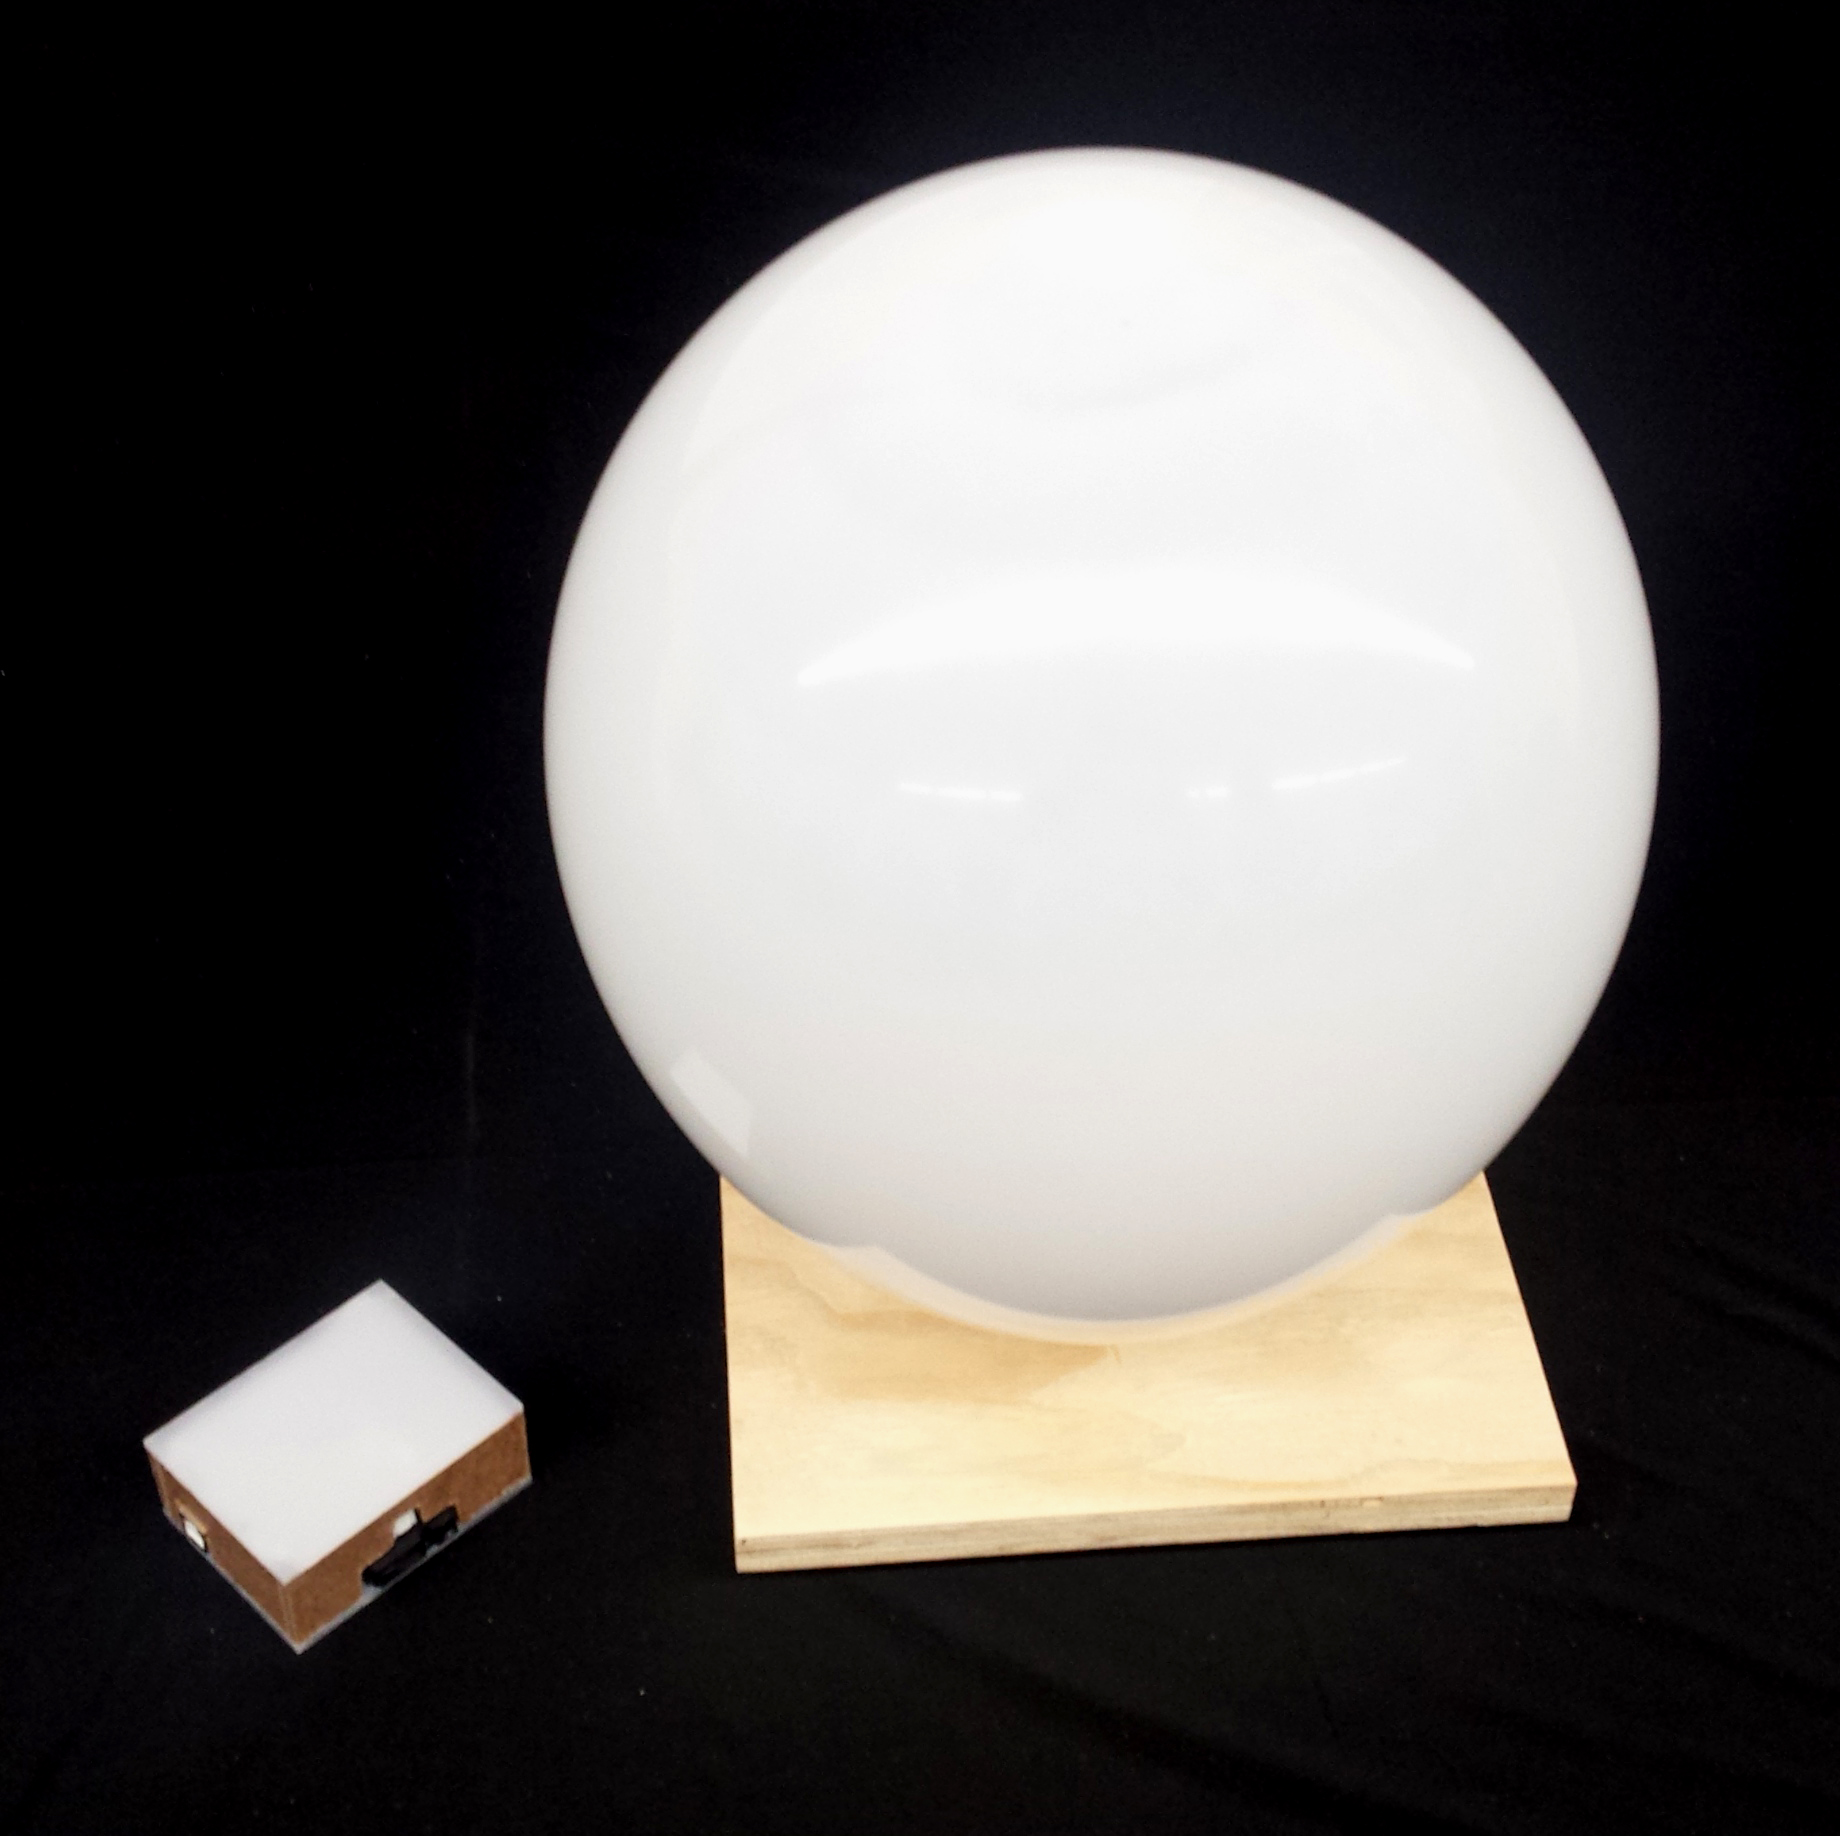
To demonstrate my project, I have built a small prototype using Arduino Uno board, a projector, a balloon to mimic curved surface of my inflated geometries and following IR distance sensor –

Product ID: 164
Distance Measuring Sensor Unit Measuring distance: 10 to 80 cm Analog output type
GP2Y0A21YK0F is a distance measuring sensor unit, composed of an integrated combination of PSD (position sensitive detector), IRED (infrared emitting diode) and signal processing circuit. The variety of the reflectivity of the object, the environmental temperature and the operating duration are not influenced easily to the distance detection because of adopting the triangulation method. This device outputs the voltage corresponding to the detection distance. So this sensor can also be used as a proximity sensor.
This SHARP distance sensor bounces IR off objects to determine how far away they are. It returns an analog voltage that can be used to determine how close the nearest object is. Comes with 12″ long 3-JST interface wire. These sensors are good for short-range detection. For over 1 m distance, we suggest using sonar sensors
To use, connect black wire to ground, red wire to 5V and white wire to analog input. The analog voltage out will range from 3V when an object is only 4″ (10 cm) away and 0.4V when the object is 32″ (80 cm) away.
Technical details –
Dimensions:
- Length: 13.53mm/0.53in
- Width: 44.39mm/1.75in
- Height: 18.67mm/0.75in
- Weight: 3.5g/0.12oz
Model – (A balloon as projection surface and IR distance sensor box)
[vsw id=”mH017x2IqCw” source=”youtube” width=”700″ height=”350″ autoplay=”no”]