
In the 1950s a dike in the Netherlands collapsed because of too much water

In 2003 a dike dried out and collapsed because it weakened
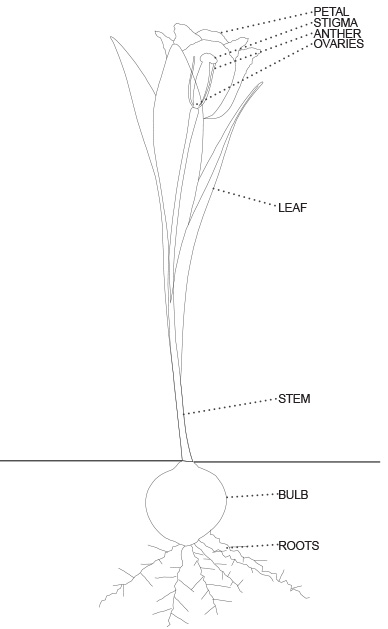
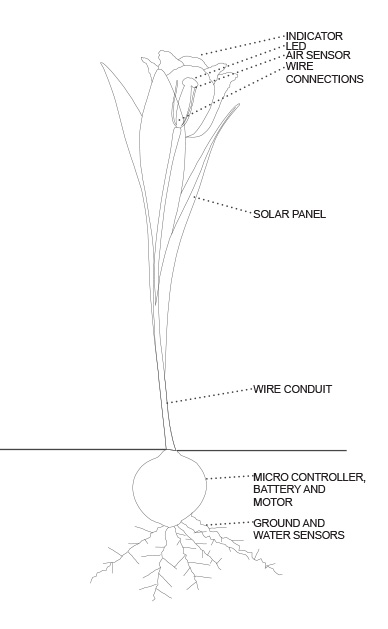
I looked into what a unit could look like that would function in the Netherlands I believe if it looks like a tulip it will blend in with the environment until actuated. The two images above are the break down of the tulip and how a sensor based prototype relates to the tulip.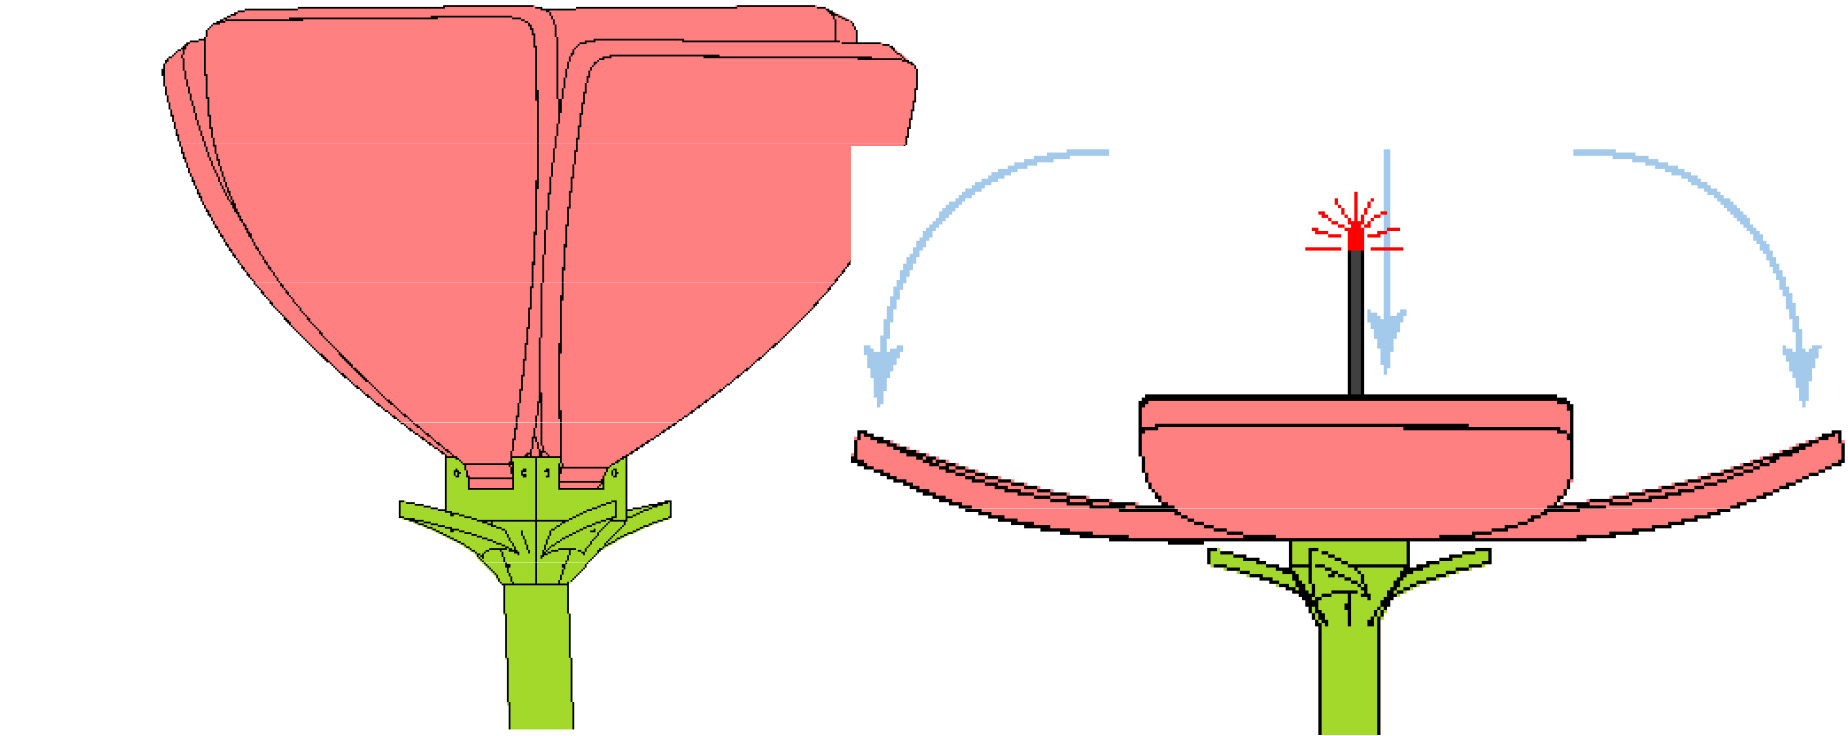
It could actuate with a muscle wire and the flower could open and an LED could flash alerting people in the area
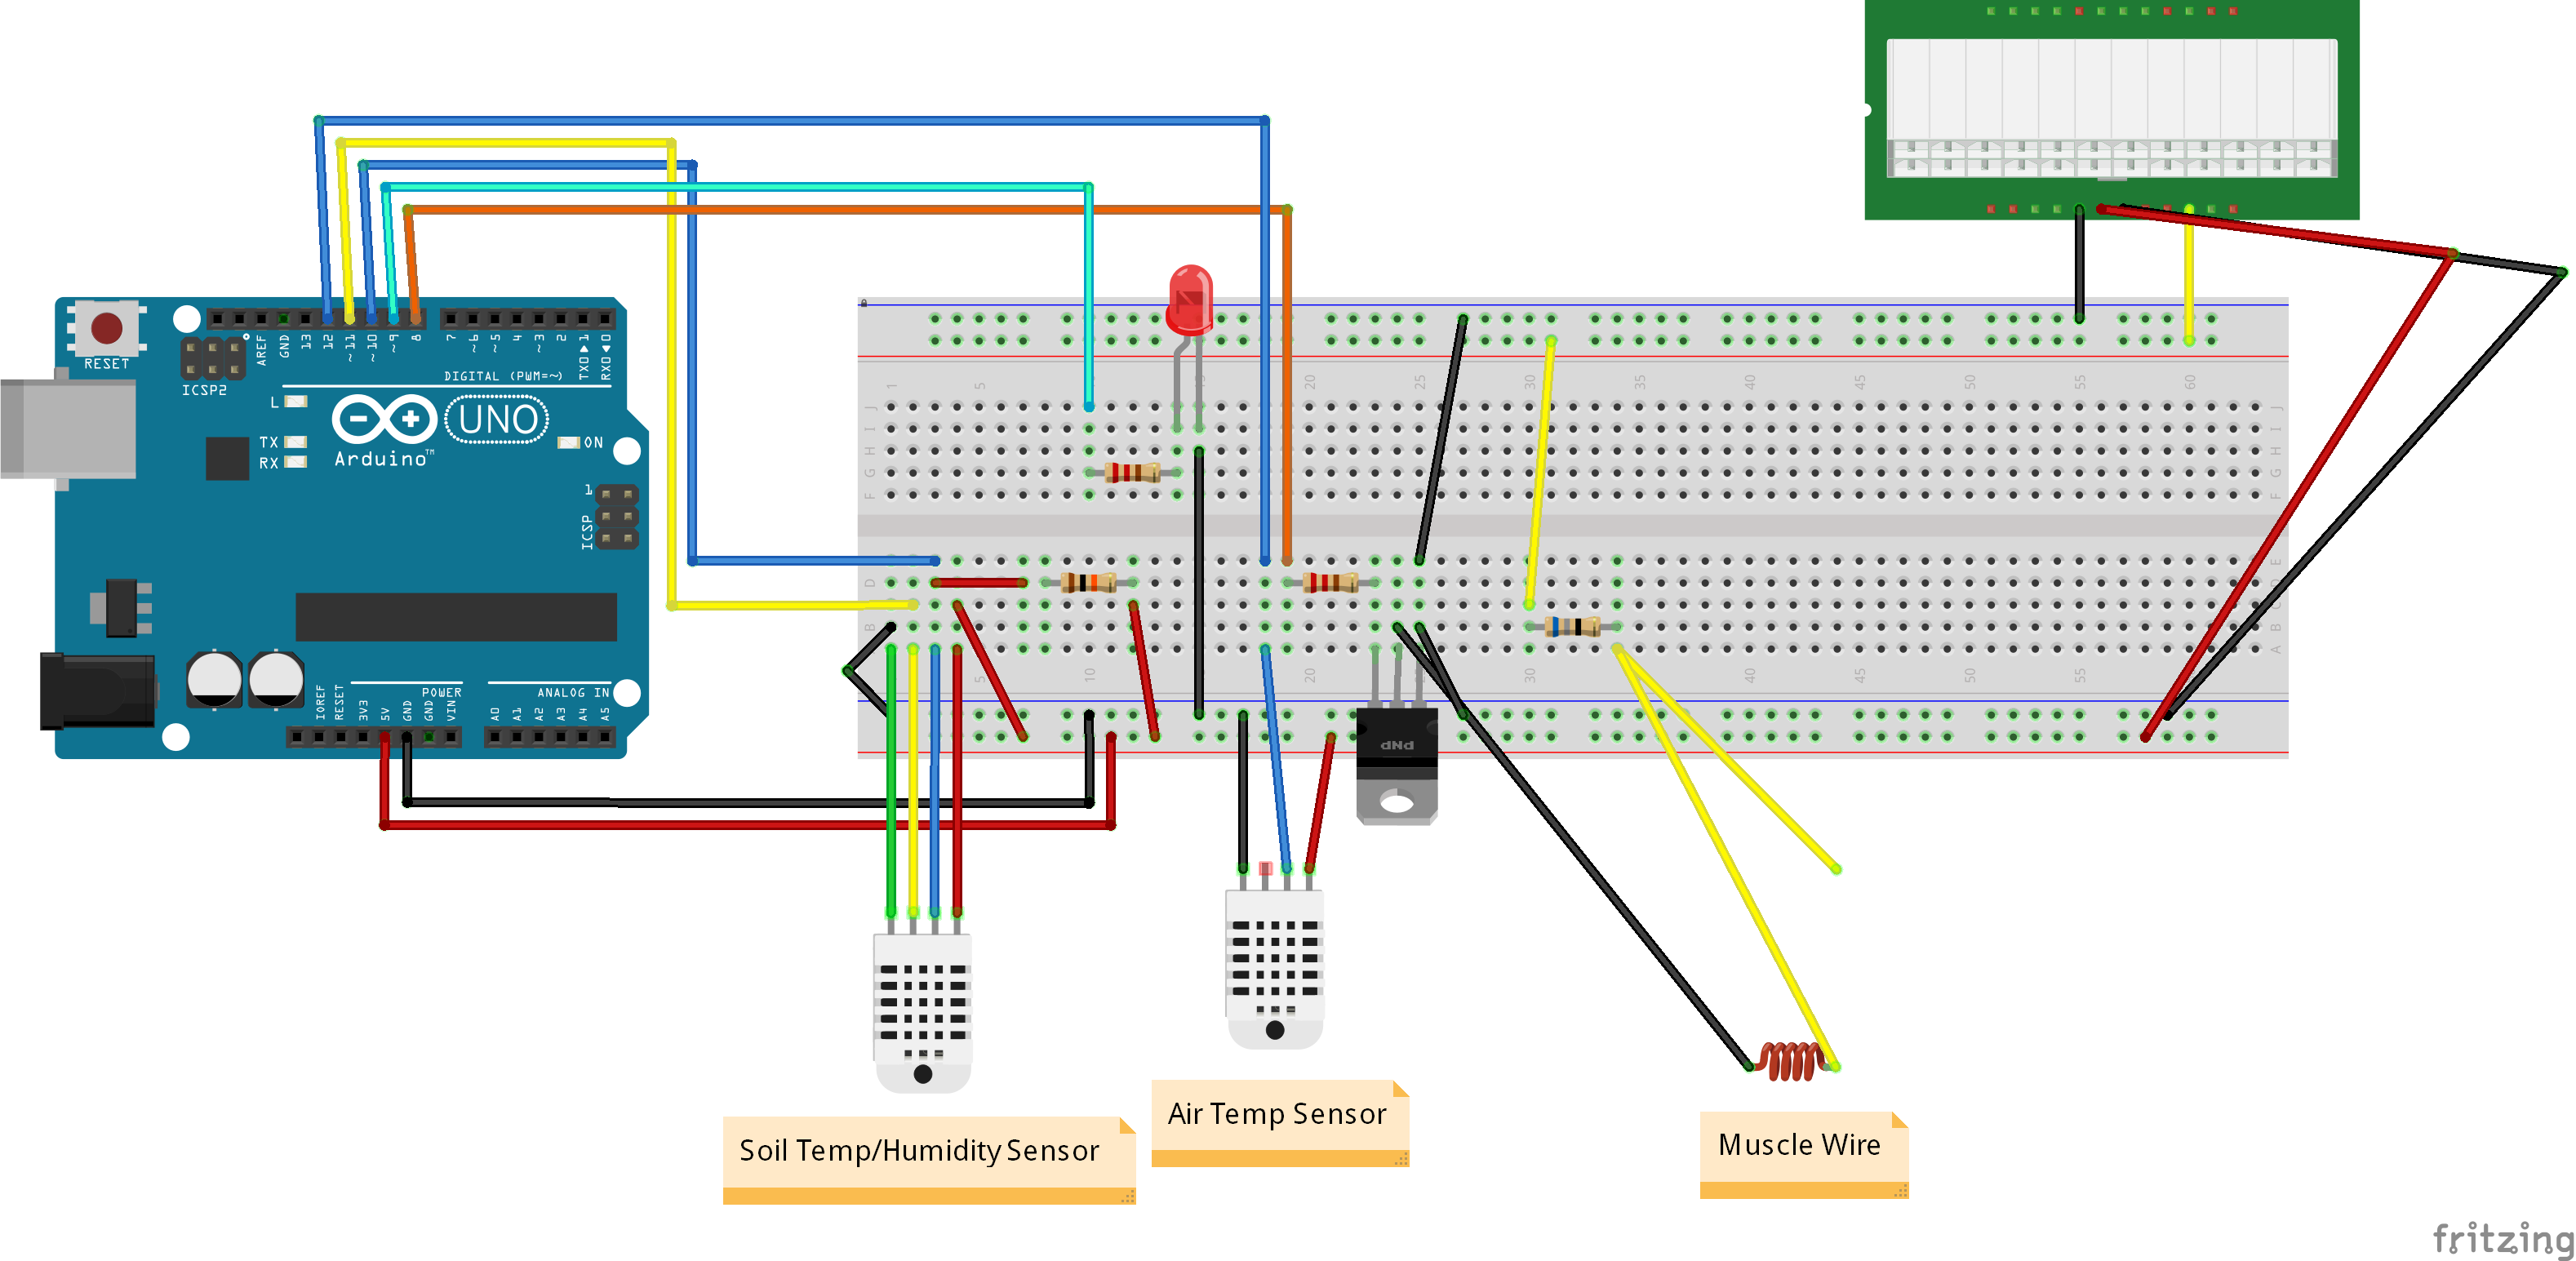
The wiring diagram for the tulip using an arduino uno, connected to a soil temperature and humidity sensor, air temperature and humidity sensor. Using an external power supply of 12v connected through a transistor the muscle wire will actuate.

I imagine the unit being a cluster with a network the cluster is above and is a sensor unit that has dummy units around it that only actuate and don’t sense anything.
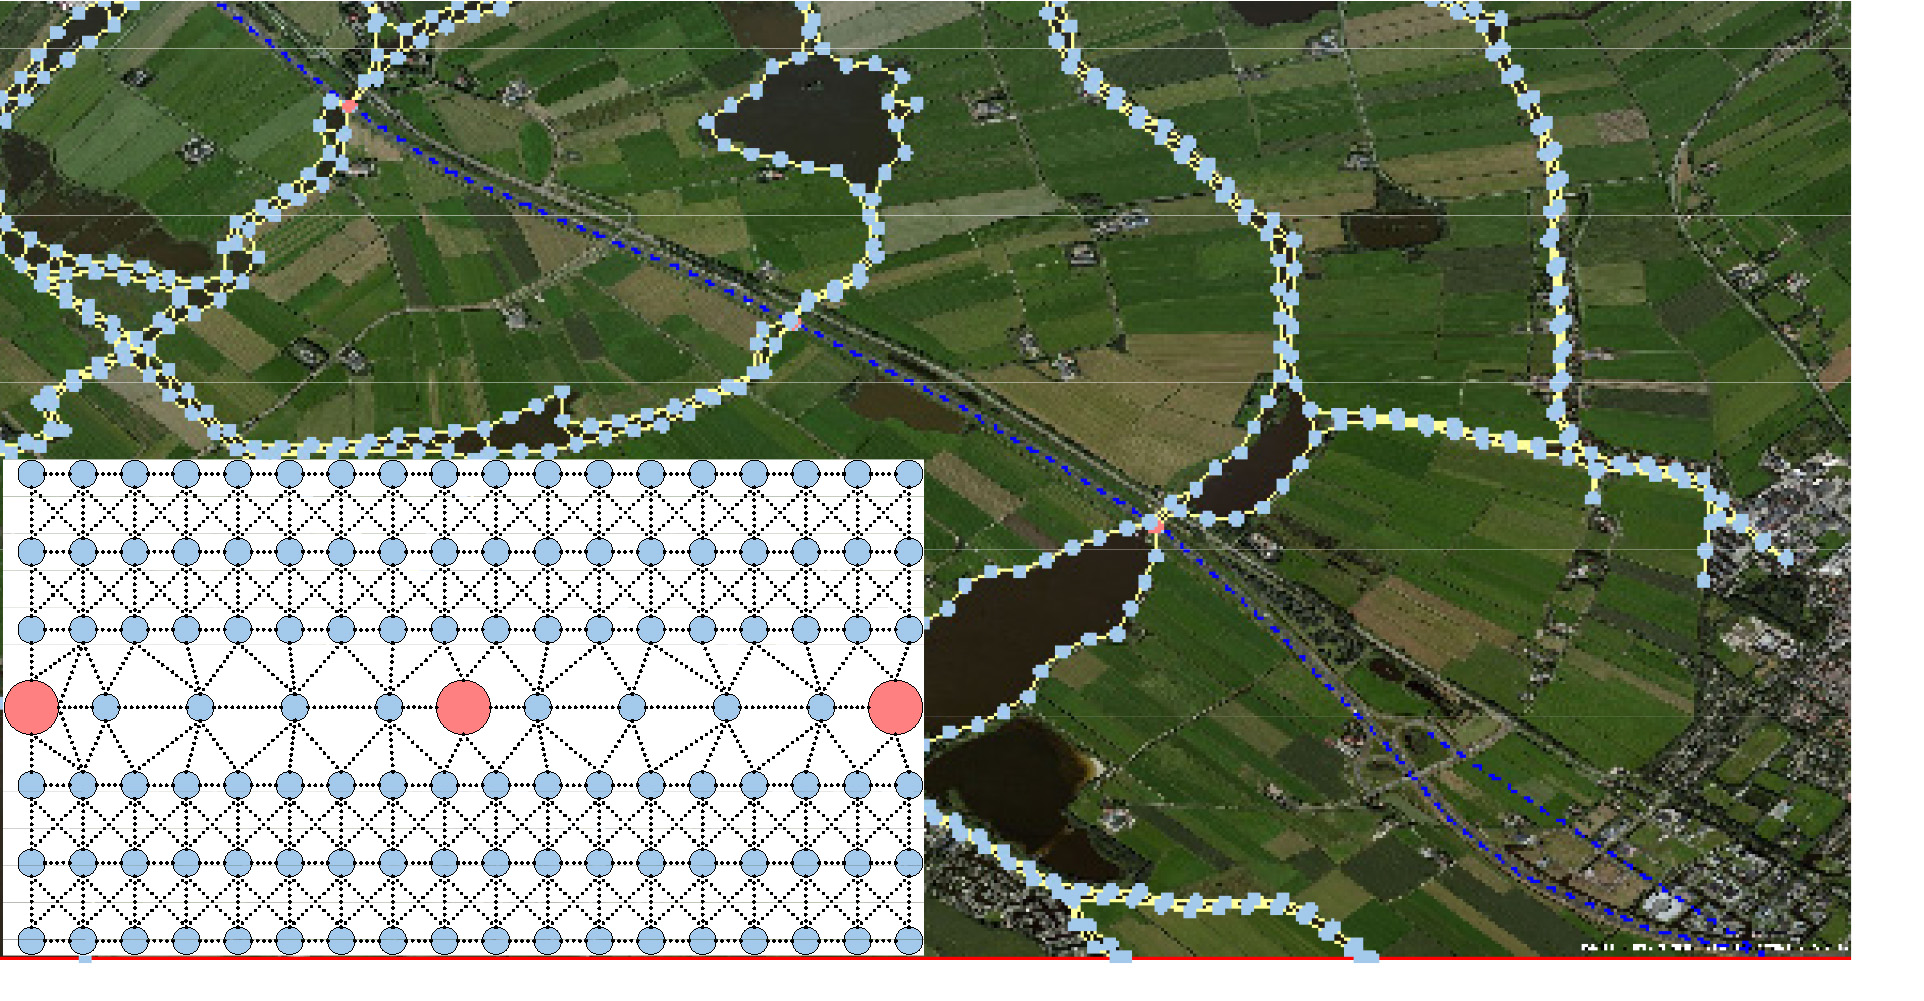
The clusters could be spread out by as far as an xbee can transmit. A server could be posted at all the road crossing and hooked back to a network
The final image is of what this might look like as an array on a dutch dike in the Netherlands

Finally the code in which this project takes place
//DutchTulip_mk02.ino
/*
mk01: So what I am attempting to produce an arduio sketch for reading the humidity and temp
sensor and when the sensor is reading low or high humidity it will push voltage to a
separate pin and fade an led in a “warning” system.
Multiple parts of this code have come from other areas.In the references section of
this code I will link in where I obtained some of my code or where I found tutorials
to help me understand the coding.
References:
http://arduino.cc/en/Tutorial/Fading
https://github.com/practicalarduino/SHT1x
How to install libraries:
http://arduino.cc/en/Guide/Libraries
mk02: Adding an RGB LED that will actuate even if the conditions are favorable.
Maybe using the RGB LED it could also have a color code for an error.
Increasing the size of the flower could provide easier printing and much easier
access to wiring.
Xbee notes: So looking at the Zigbee networking, it looks like to hook up the small network
I will need four items these will be two xbee modules. A usb explorer for connection to the
computer. A xbee shield that will fit right on top of the arduino. These can be purchased at
radio shack.
SparkFun XBee Explorer USB $24.95
SparkFun XBee Shield $14.95
2 XBee Modules $24.95 each
Arduino Uno R3 Headers $1.95
Kit http://www.amazon.com/Xbee-Wireless-Kit-by-Sparkfun/dp/B00BD9TZGM $94.95 (free shipping)
Xbee buying guides:
https://www.sparkfun.com/pages/xbee_guide
*/
int ledPin = 9;
// LED connected to digital pin 9
// Digital pins with the ~ are able to do fading also known as PWM
int musclePin = 8;
// Setting my musclewire to pin 8
int repeat;
unsigned long previousMillis = 0; //will store last time LED was updated
unsigned long time; //storing time <– not quite sure yet 10.27
const long interval = 150; //interval at witch to pause between fading
// constants won’t change
#include <SHT1x.h>
// Specify data and clock connections and instantiate SHT1x object
// I installed the SHT1x library into the sketchbook
#include <DHT.h>
// include the library for the air sensor DHT11
#define dataPin 10
// data pin is the blue wire
#define clockPin 11
// clock is the yellow wire
#define DHTPIN 12
// data pin for air sensor is 2
// looking at the front second from the left is the data pin
#define DHTTYPE DHT11
SHT1x sht1x(dataPin, clockPin);
DHT dht(DHTPIN, DHTTYPE);
void setup(){
Serial.begin(9600);
// Open serial connection to report values to host
Serial.println(“Initializing”);
pinMode(ledPin, OUTPUT);
pinMode(musclePin, OUTPUT);
dht.begin();
}
void loop(){
float temp_c;
float temp_f;
float humidity;
float air_temp_c;
float air_temp_f;
float air_humidity;
// Read values from the ground sensor
temp_c = sht1x.readTemperatureC();
temp_f = sht1x.readTemperatureF();
humidity = sht1x.readHumidity();
air_temp_c = dht.readHumidity();
air_temp_f = dht.readTemperature(true);
air_humidity = dht.readTemperature();
// Print the values to the serial port
Serial.println(“Soil: “);
Serial.print(“Temperature: “);
Serial.print(temp_c, DEC);
Serial.print(” C / “);
Serial.print(temp_f, DEC);
Serial.print(” F.”);
Serial.print(“Humidity: “);
Serial.print(humidity);
Serial.println(“%”);
Serial.println(“Air: “);
Serial.print(“Temperature: “);
Serial.print(air_temp_c);
Serial.print(” C / “);
Serial.print(air_temp_f);
Serial.print(” F “);
Serial.print(“Humidity: “);
Serial.print(air_humidity);
Serial.println(” %”);
time =millis();
Serial.print(“Time: “);
Serial.println(time);
delay(repeat);
if(humidity <= 20 || humidity == 100){
digitalWrite(musclePin, HIGH);
for (int fadeValue = 0 ; fadeValue <= 255; fadeValue++) {
// sets the value (range from 0 to 255):
analogWrite(ledPin, fadeValue);
// wait for 5 milliseconds to see the dimming effect
delay(5);
}
// fade out from max to min in increments of 5 points:
for (int fadeValue = 255 ; fadeValue >= 0; fadeValue–) {
// sets the value (range from 0 to 255):
analogWrite(ledPin, fadeValue);
// wait for 5 milliseconds to see the dimming effect
delay(5);
repeat = 0;
}
}
else
digitalWrite(musclePin, LOW);
digitalWrite(ledPin, LOW);
}